Hello and welcome to the next installment of this ongoing exploratory series. In the previous posts I've roughly outlined my thought processes and workflow in generated a series of structural forms in a space, which were largely based on data gleaned from a series of simple analyses based on a recorded movement.
In this post I'll be sharing the diagrams and analyses generated for the final creation of the structure and outline the process of bringing it all together to create a structure set in a given space.
Prior to proceeding with the analyses, I'll briefly mention the overall workflow regarding the generation of the following graphs. A lot of these were done by hand, the form breaking down and the drawing of different perceived associations between the sequence of movements. They were then photographed and redrawn in Photoshop for the purposes of clarity.
UNIT 4 - GENERATING DIAGRAMS AND ANALYSES
To get started I will be sharing the first batch of analyses carried out in a pretty long slideshow below. I will then take a few and discuss what I exactly I did and the thinking behind those decisions.


Unfortunately the presentation is in Greek as my program of study is in Greek, but I'll be translating and explaining what I consider to be the most important analyses carried out.
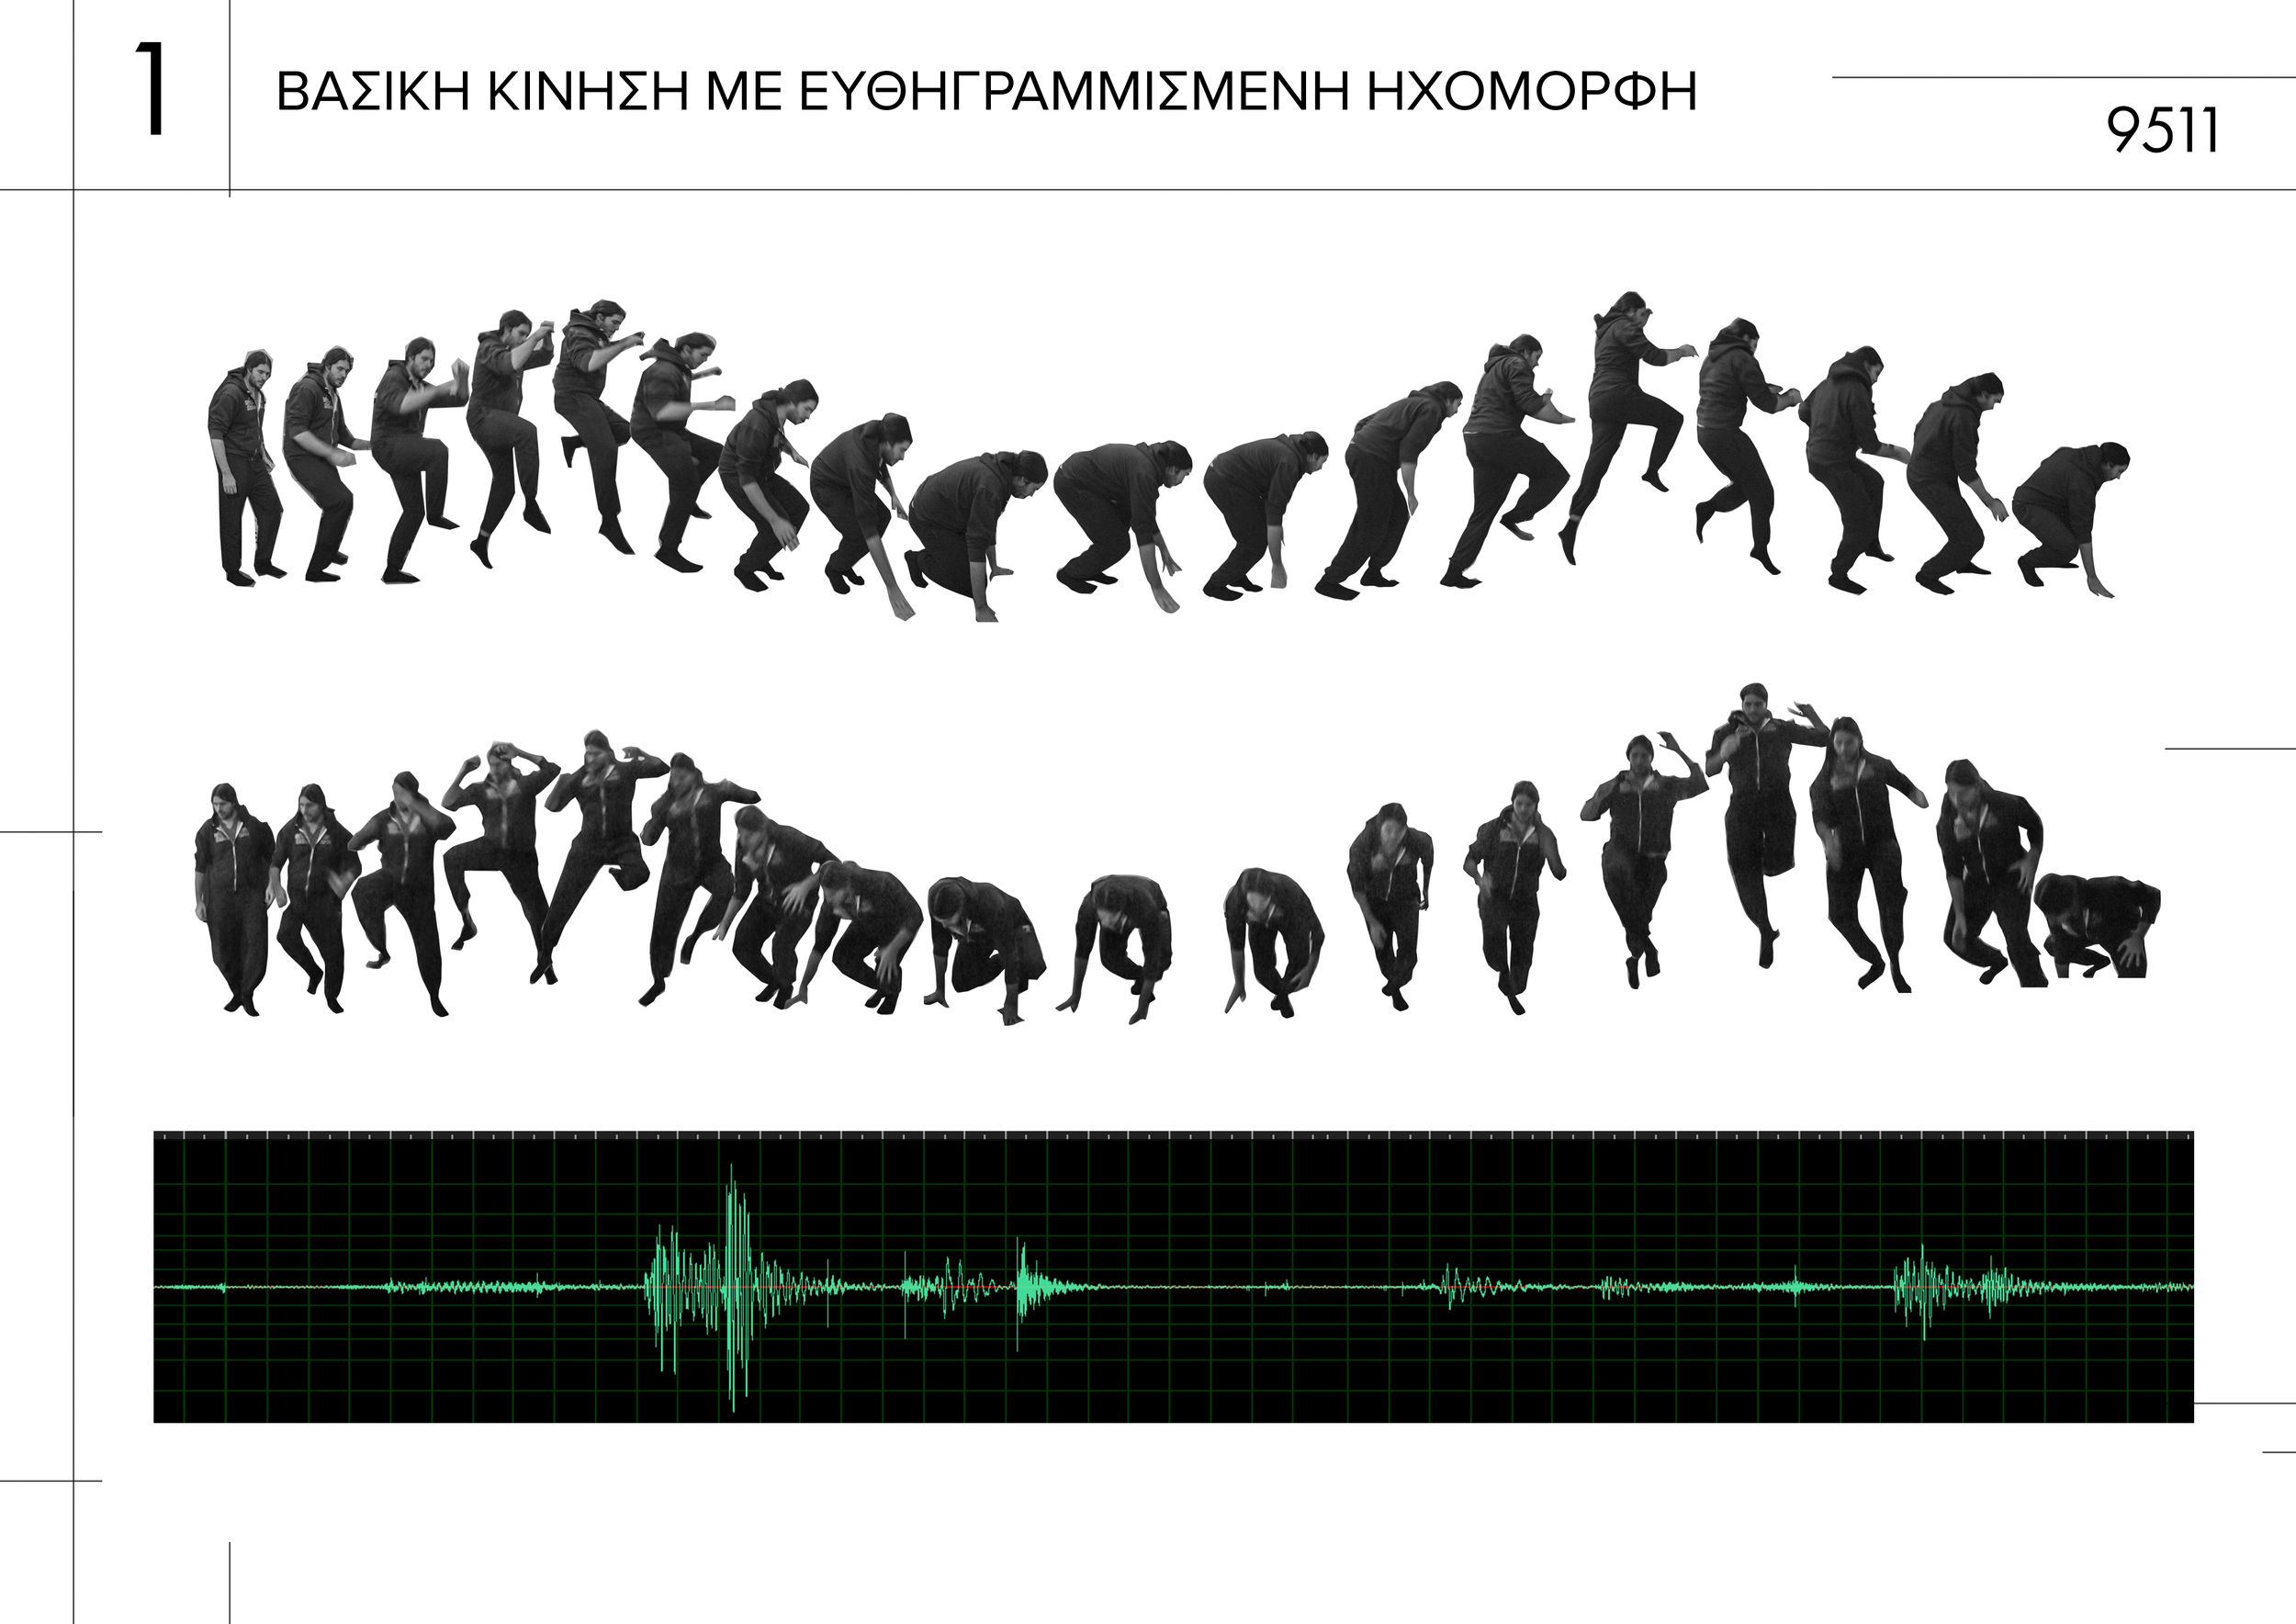
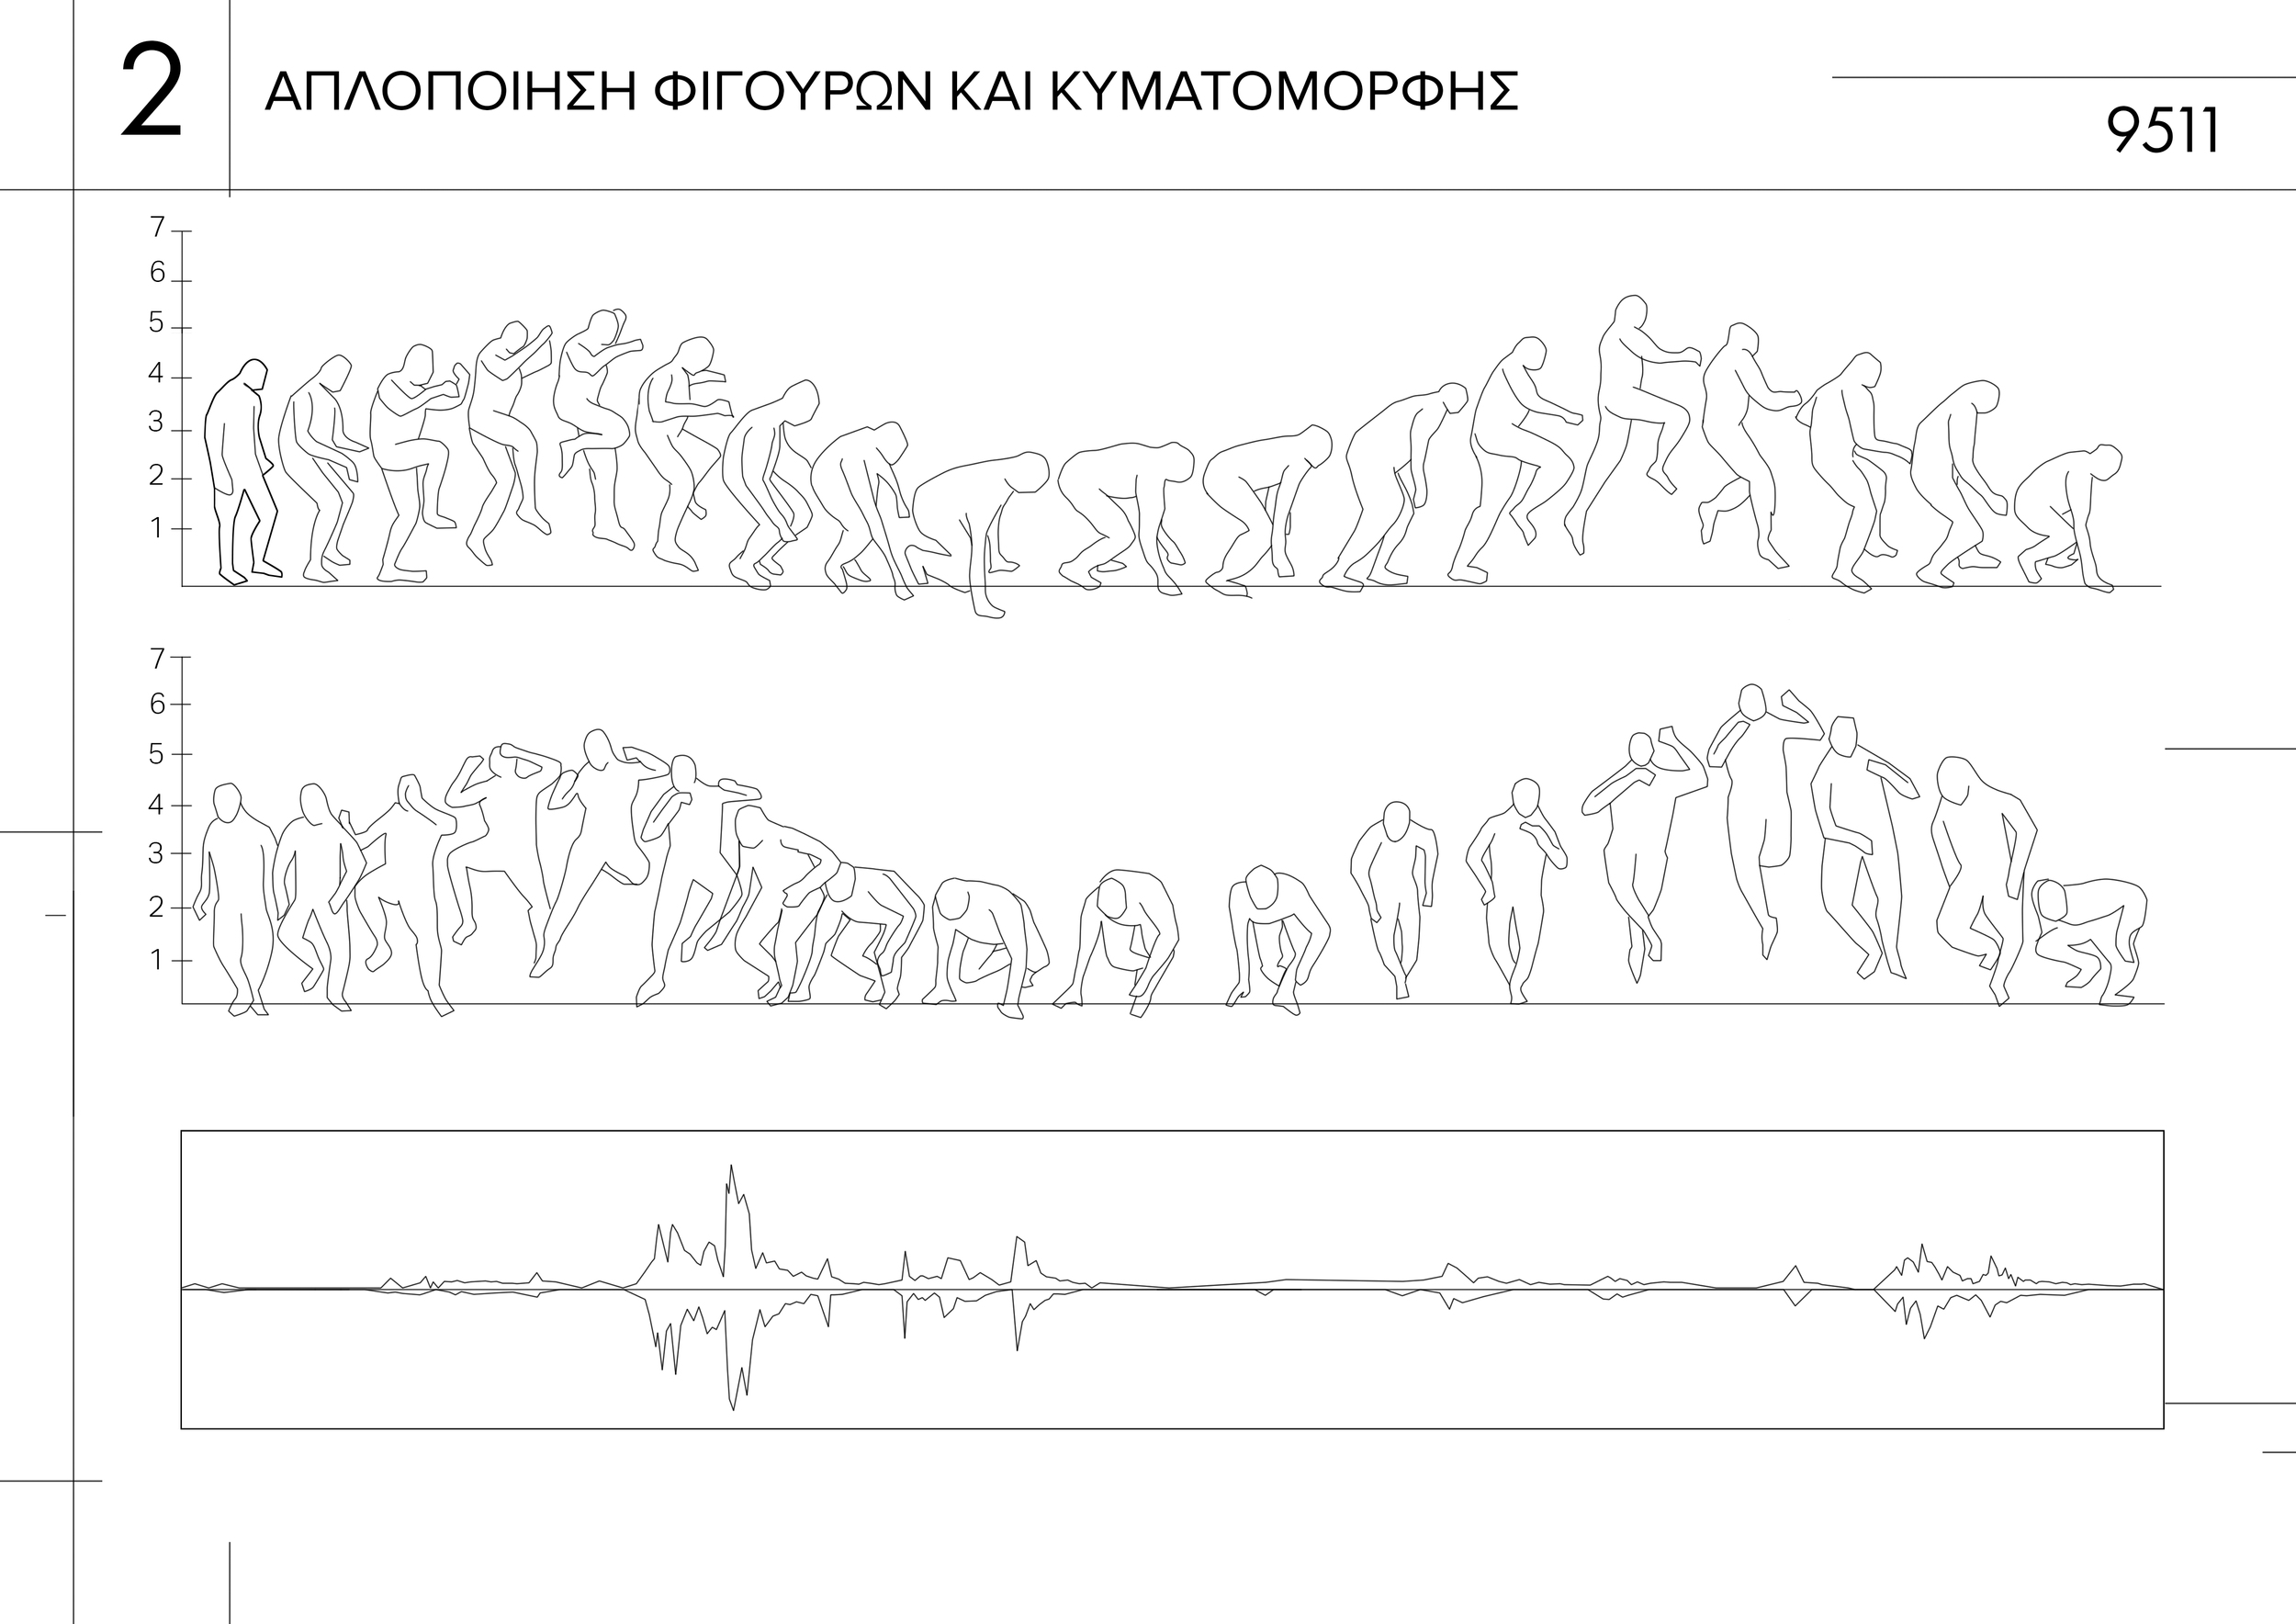
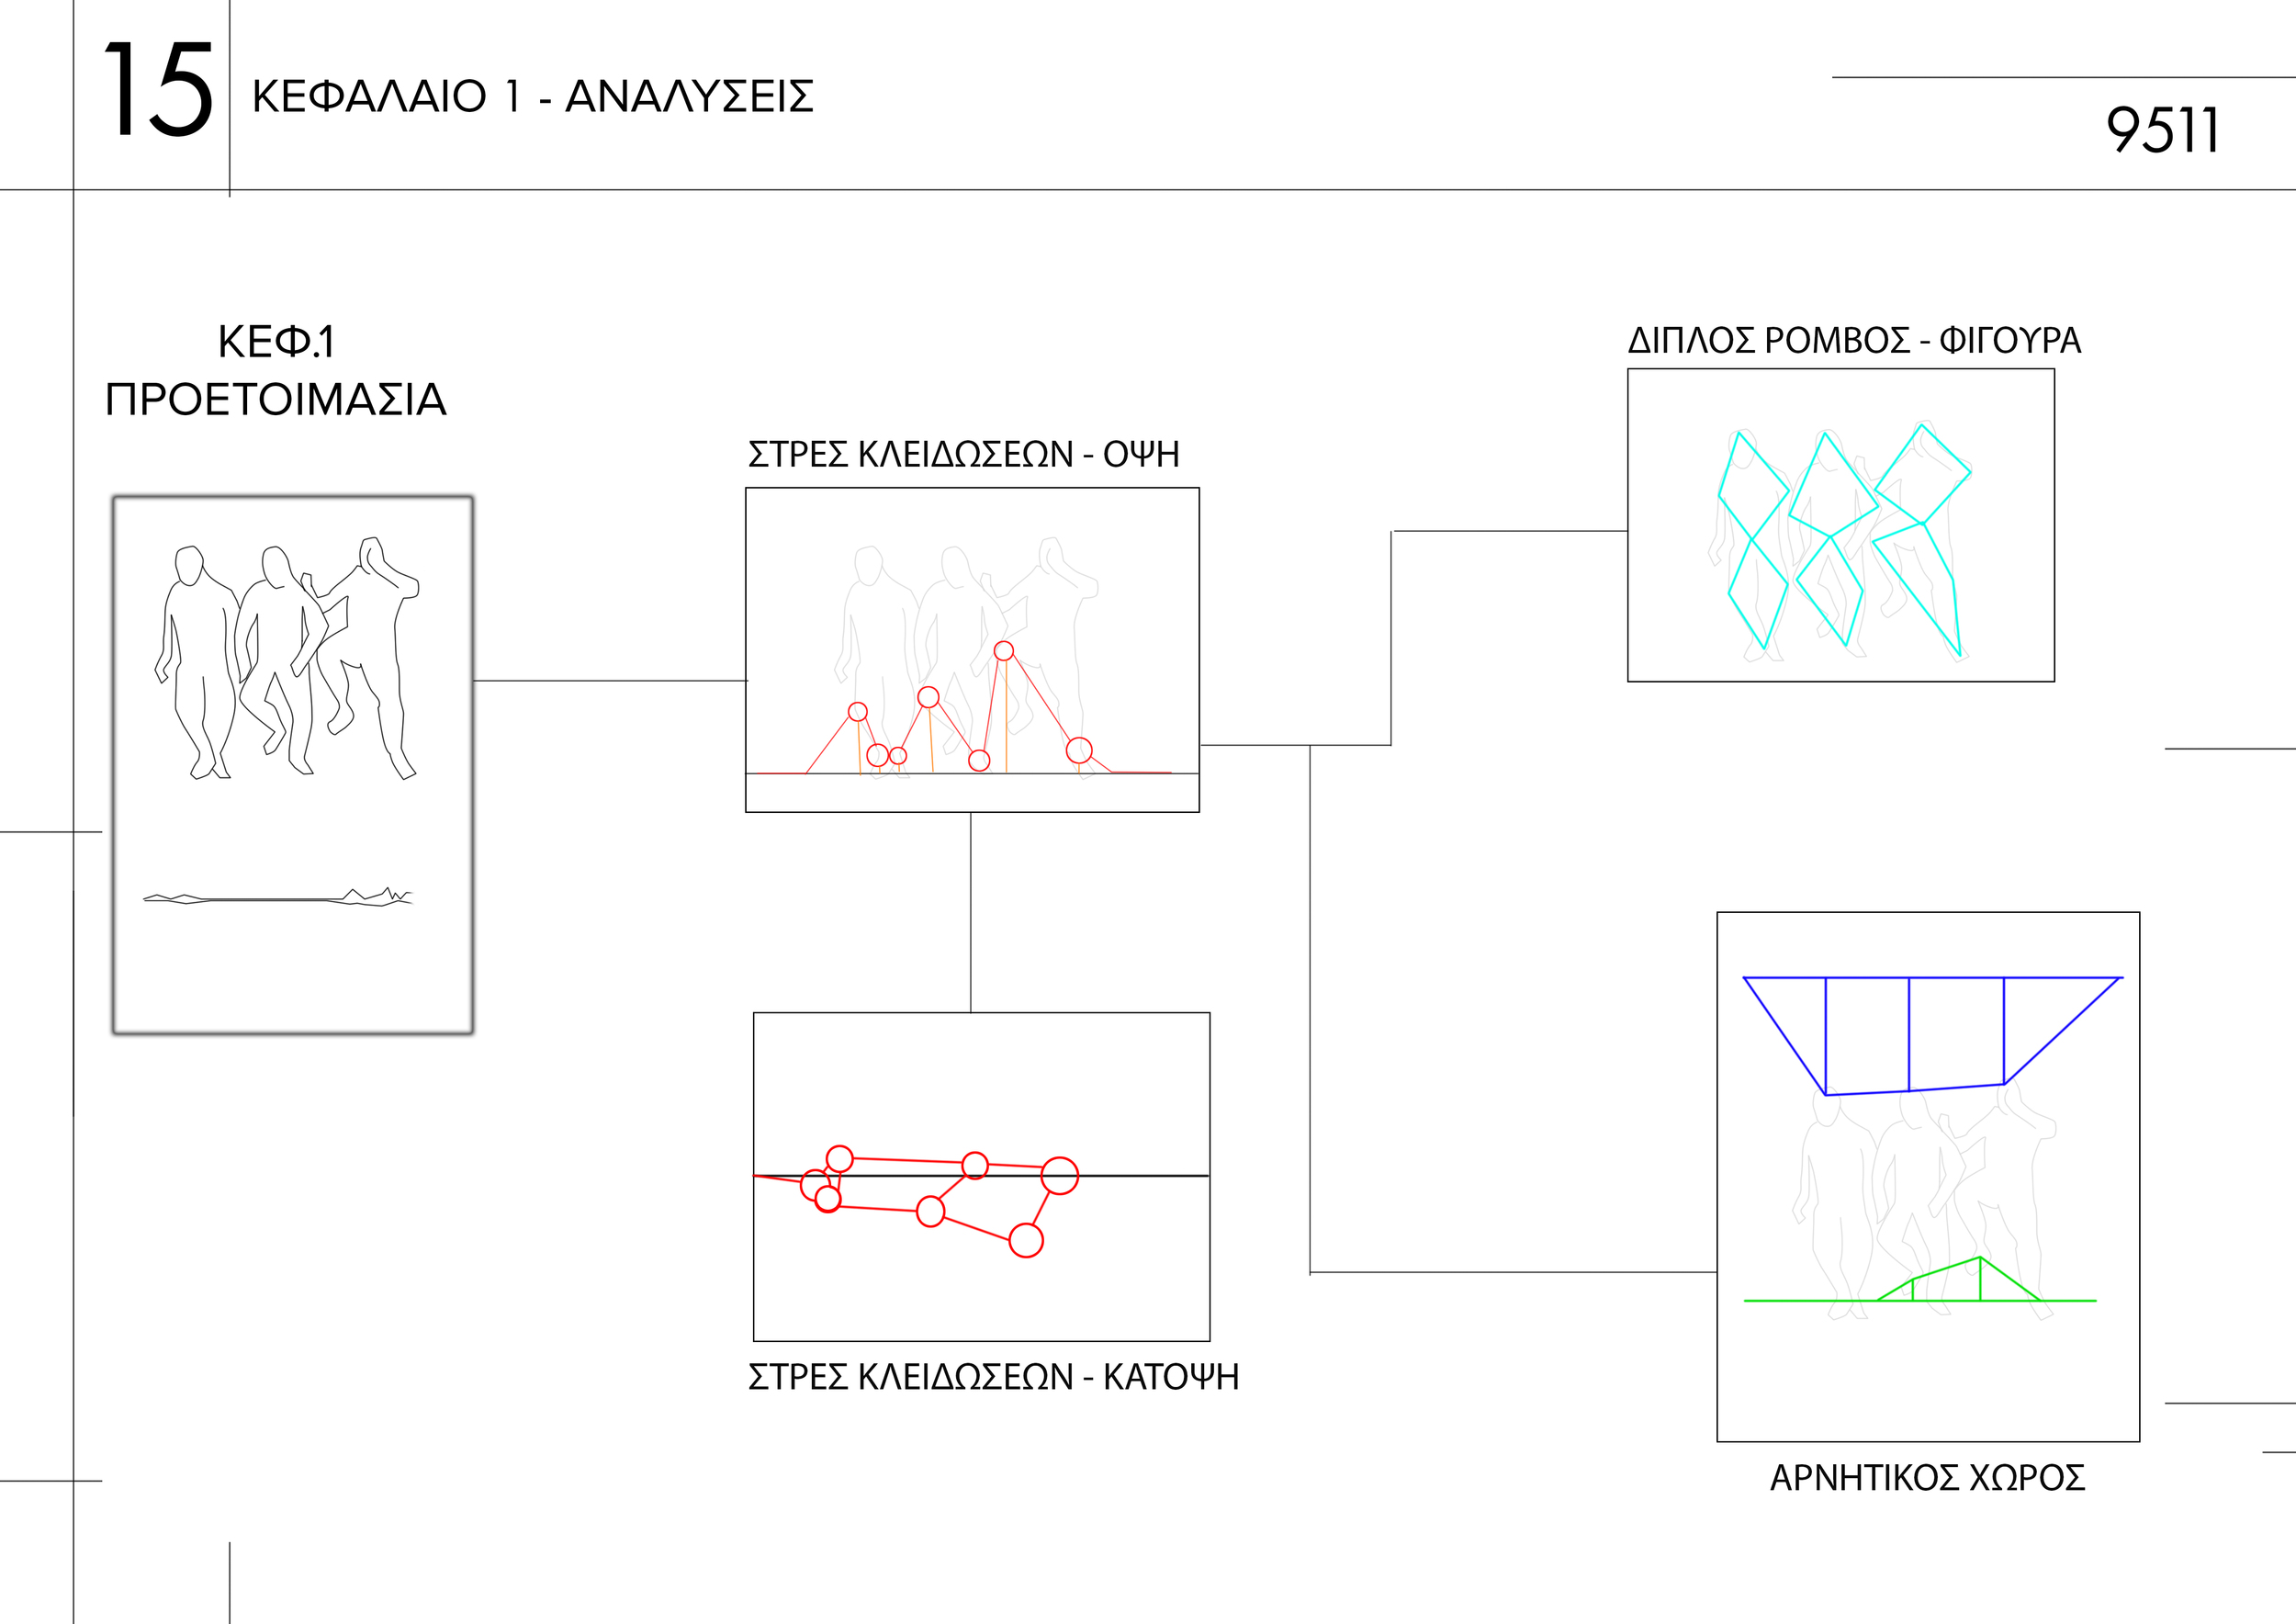
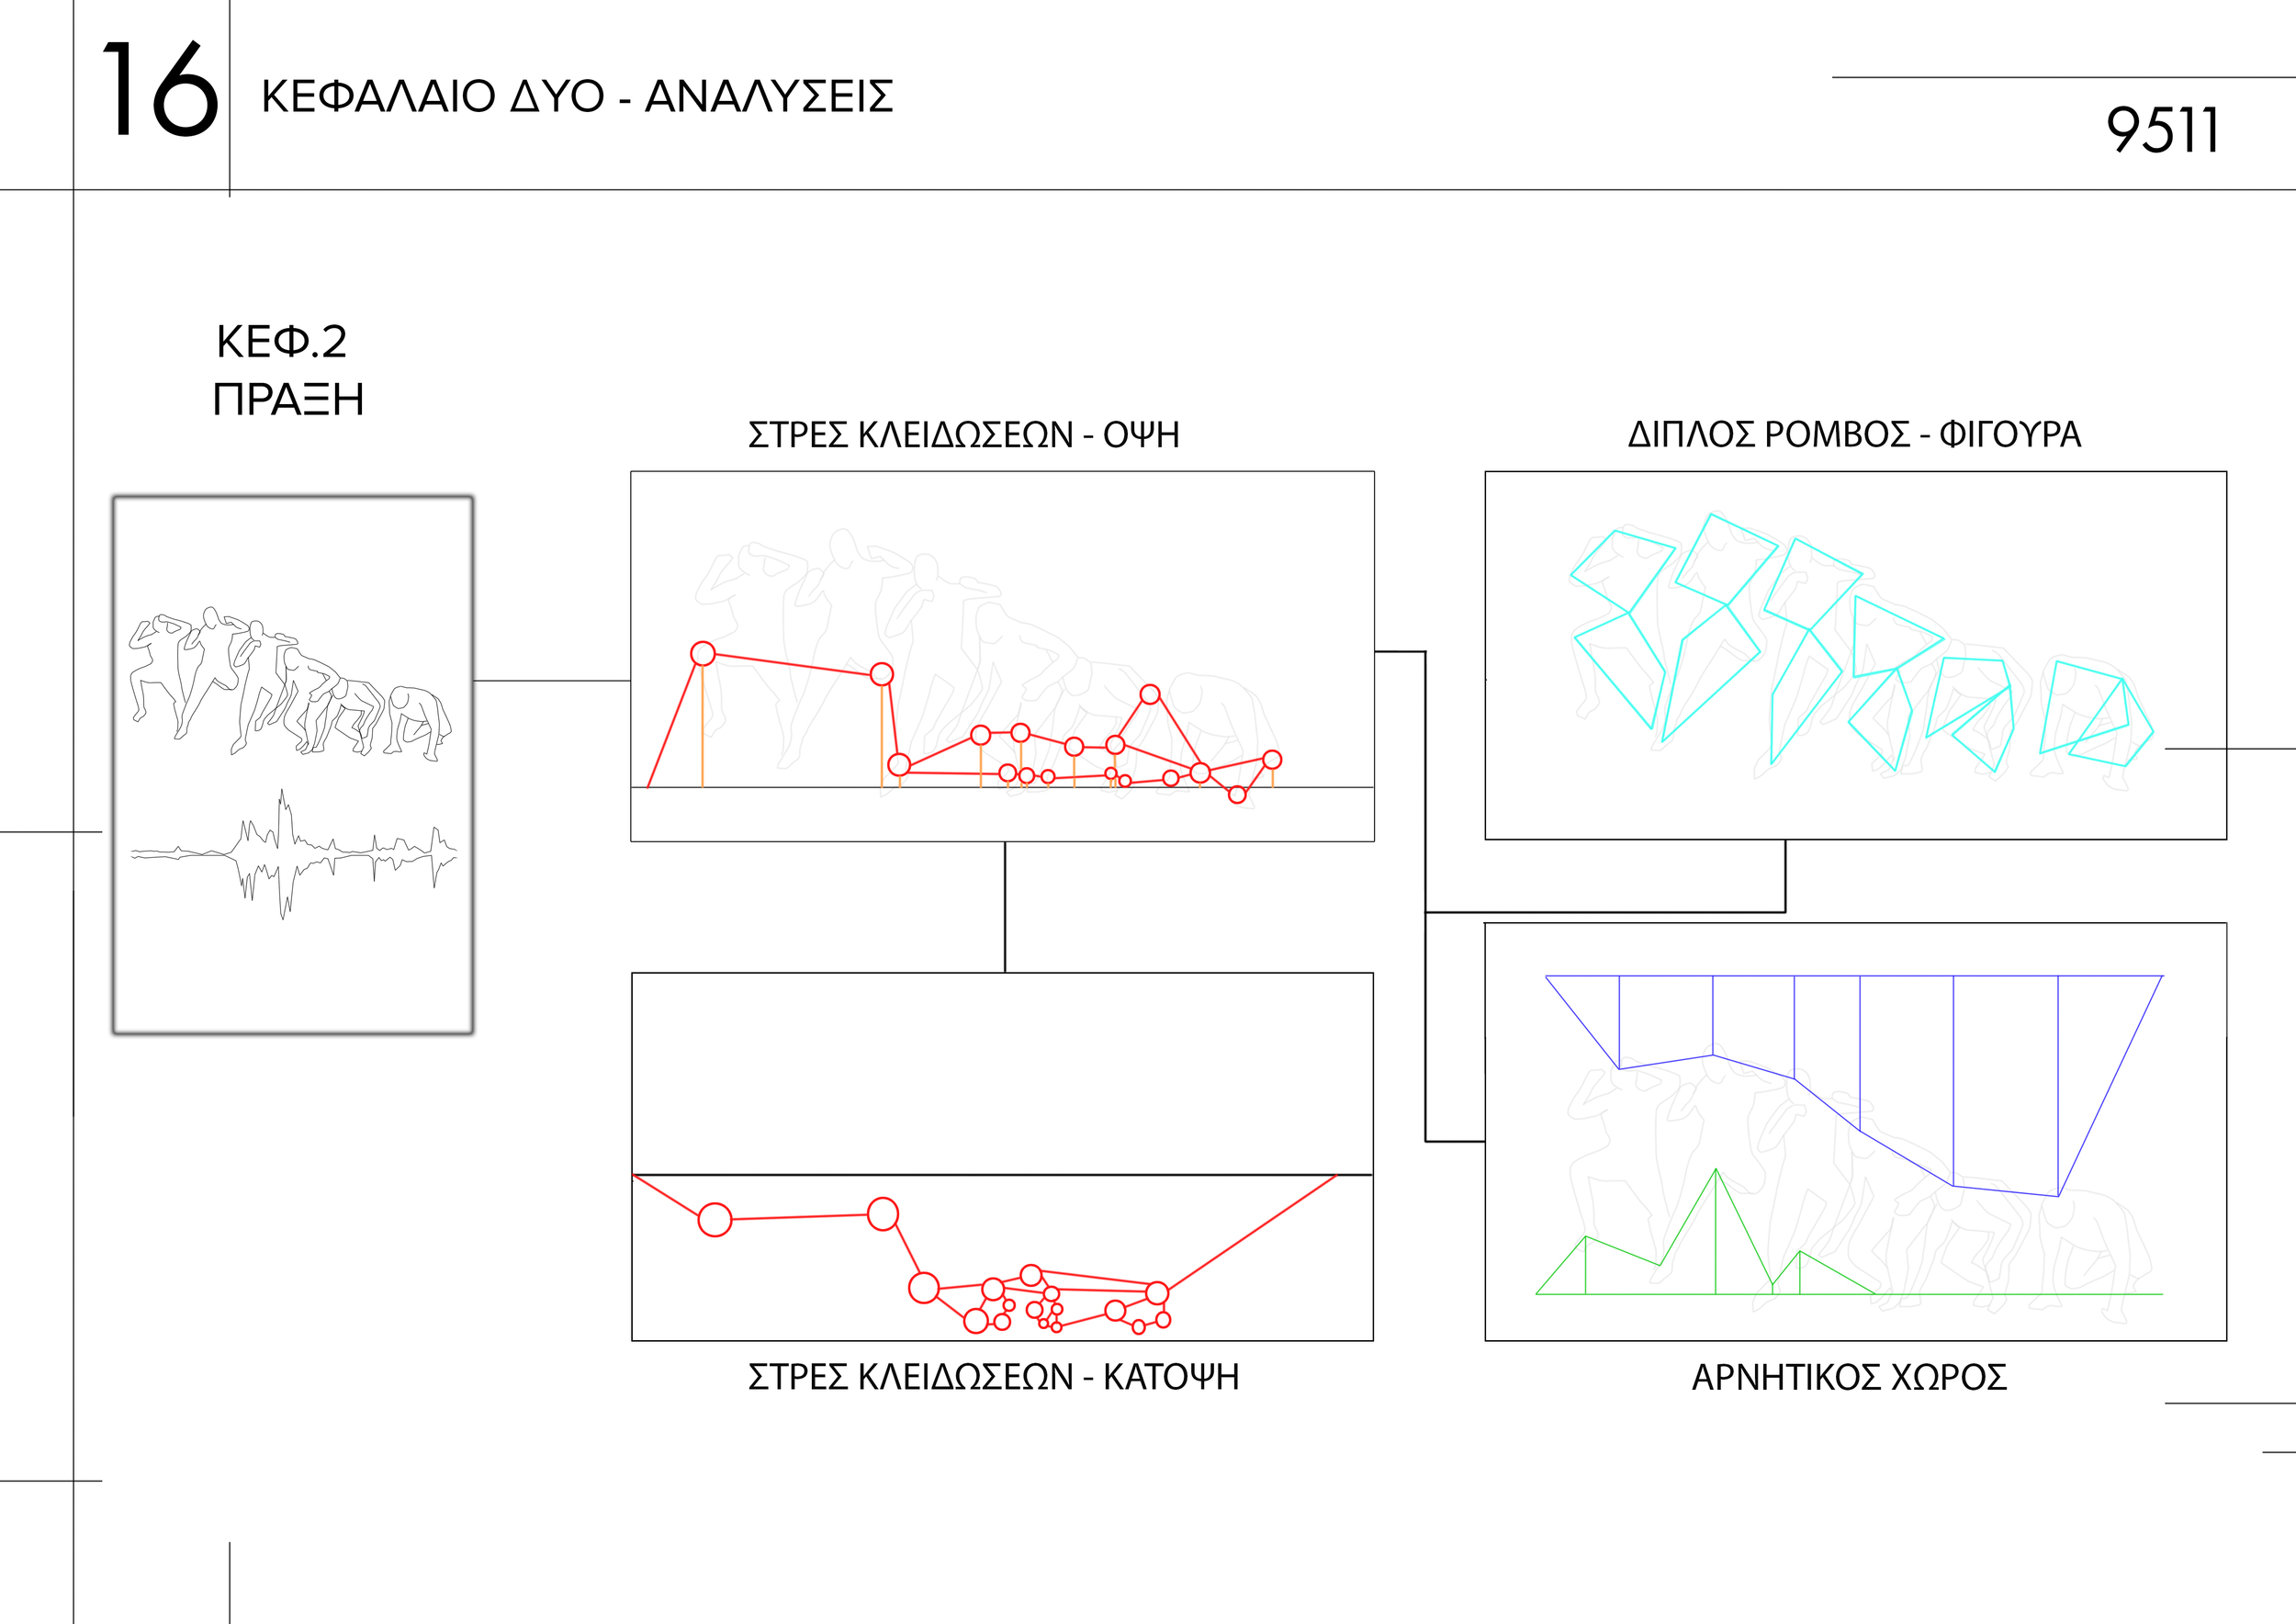
To begin with, the first two slides just illustrate the sequence of the movement from which all analyses stemmed from.
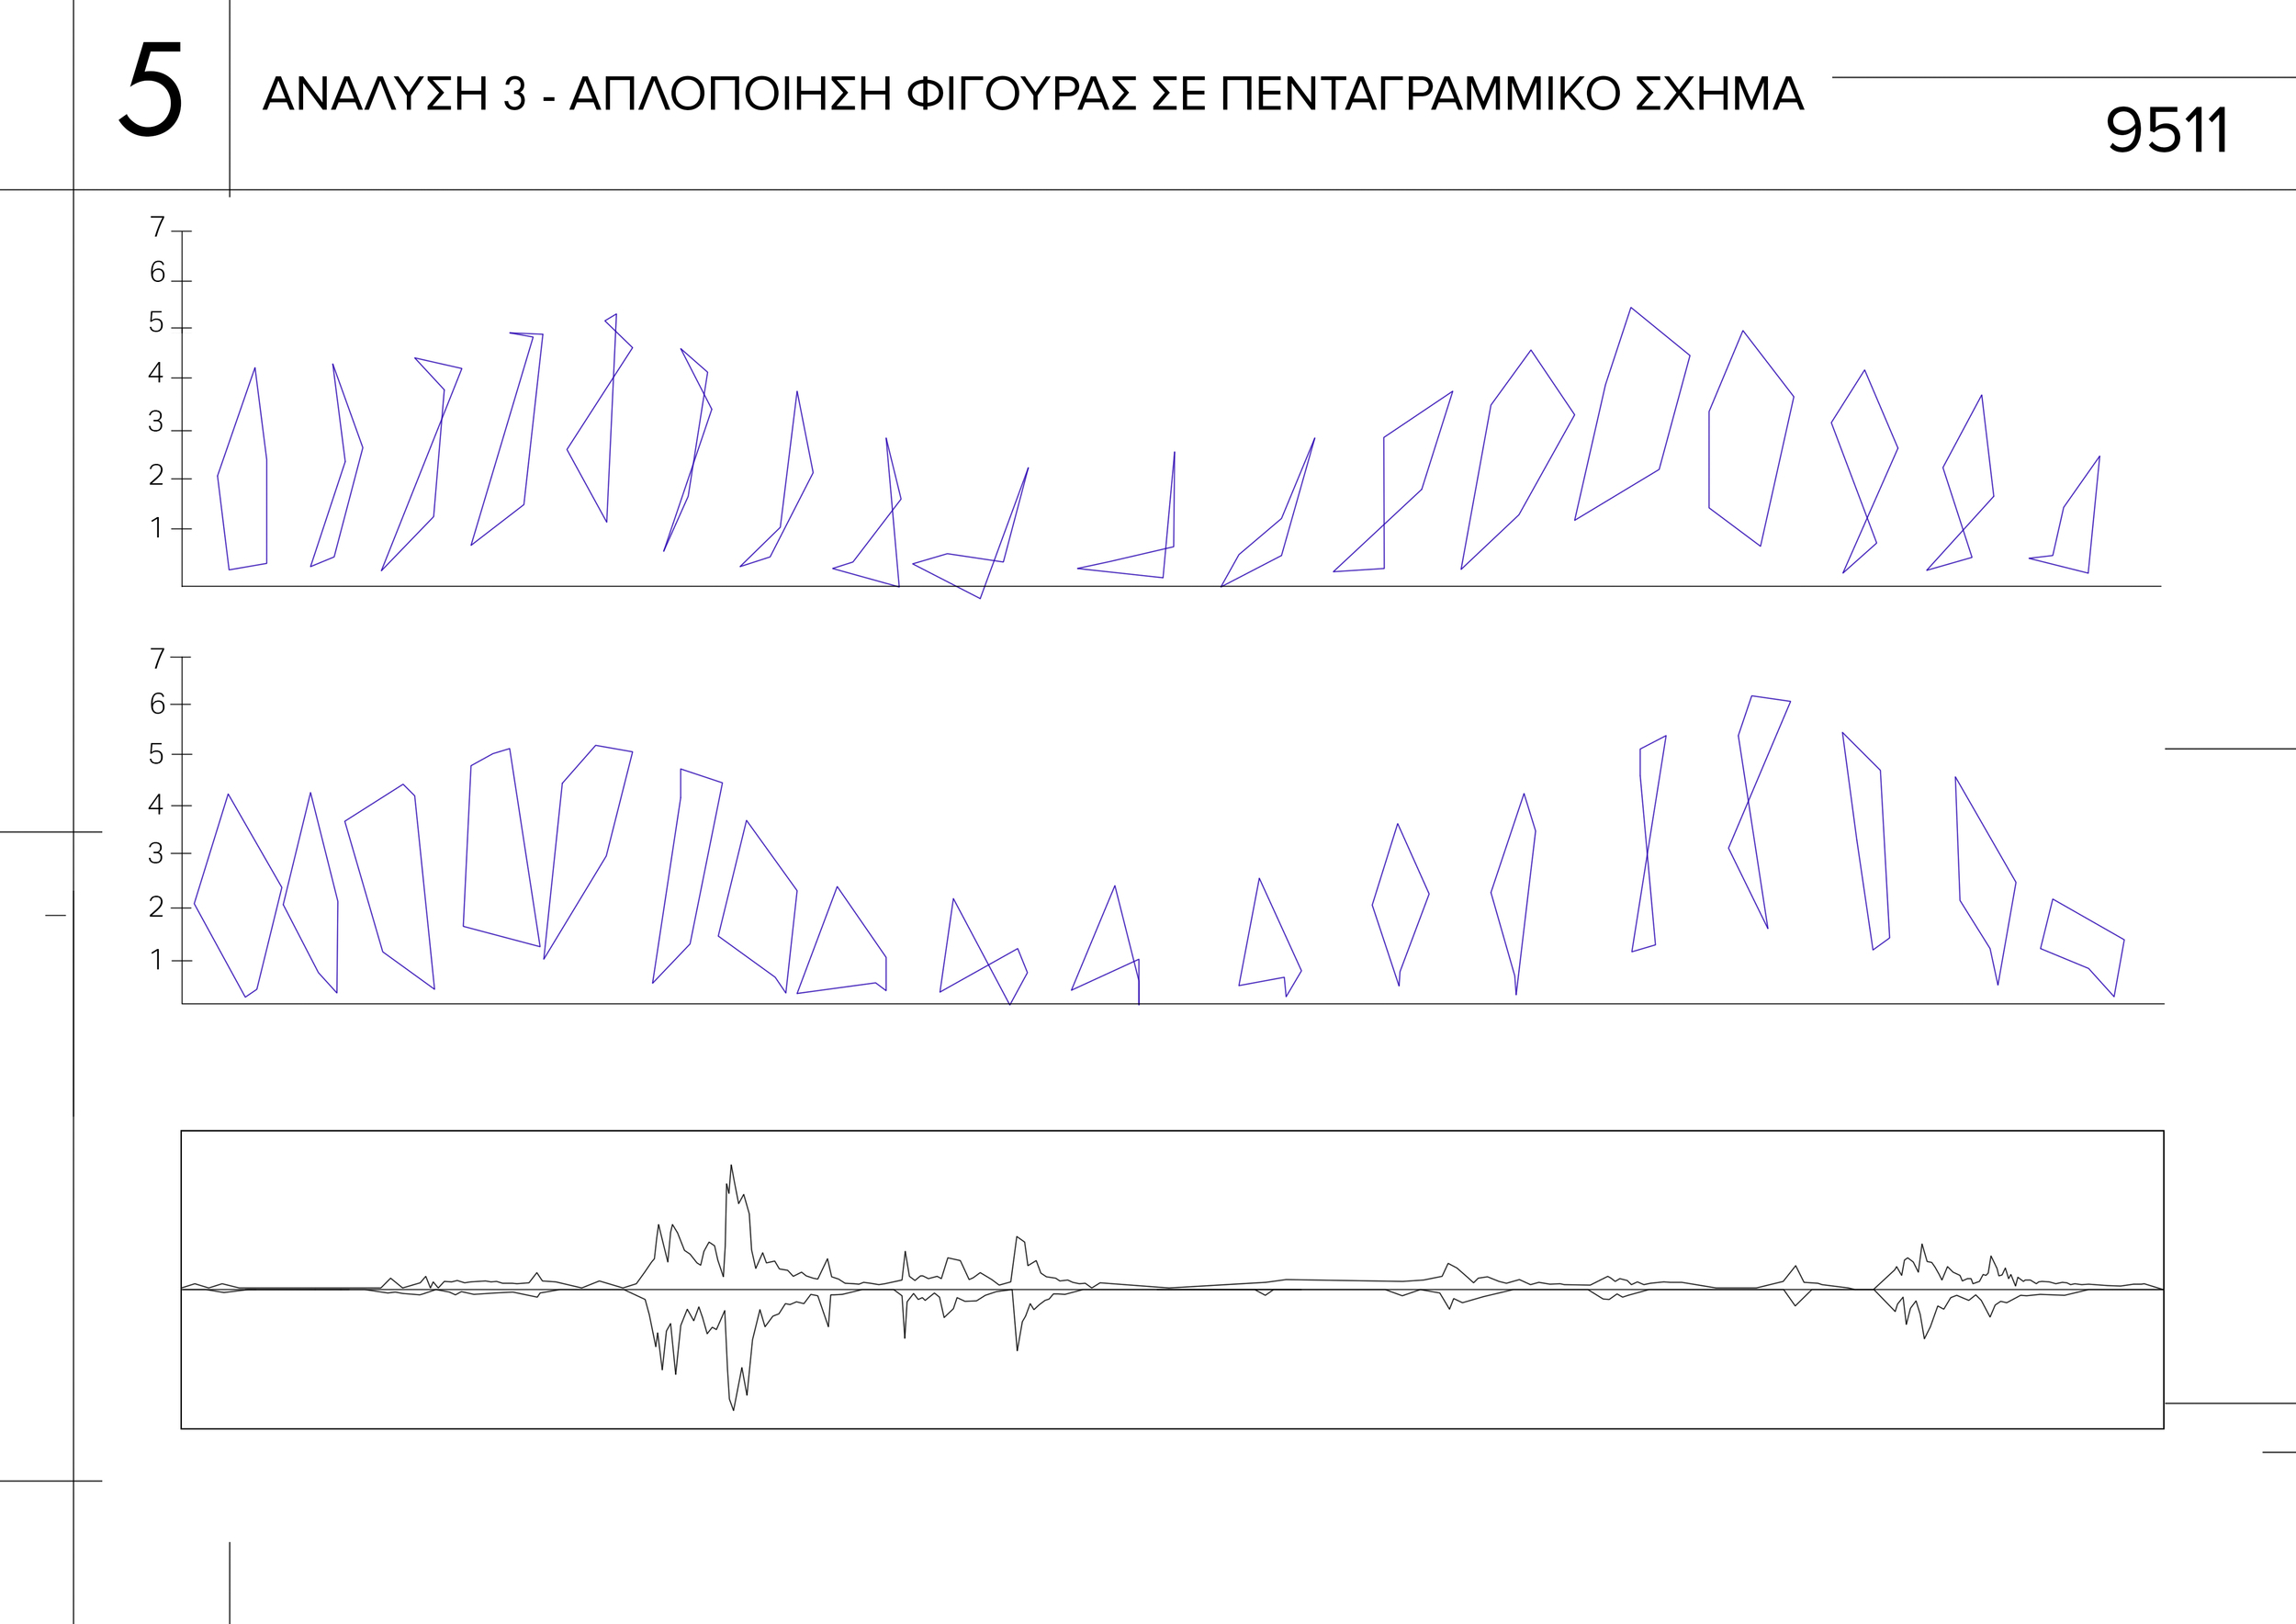
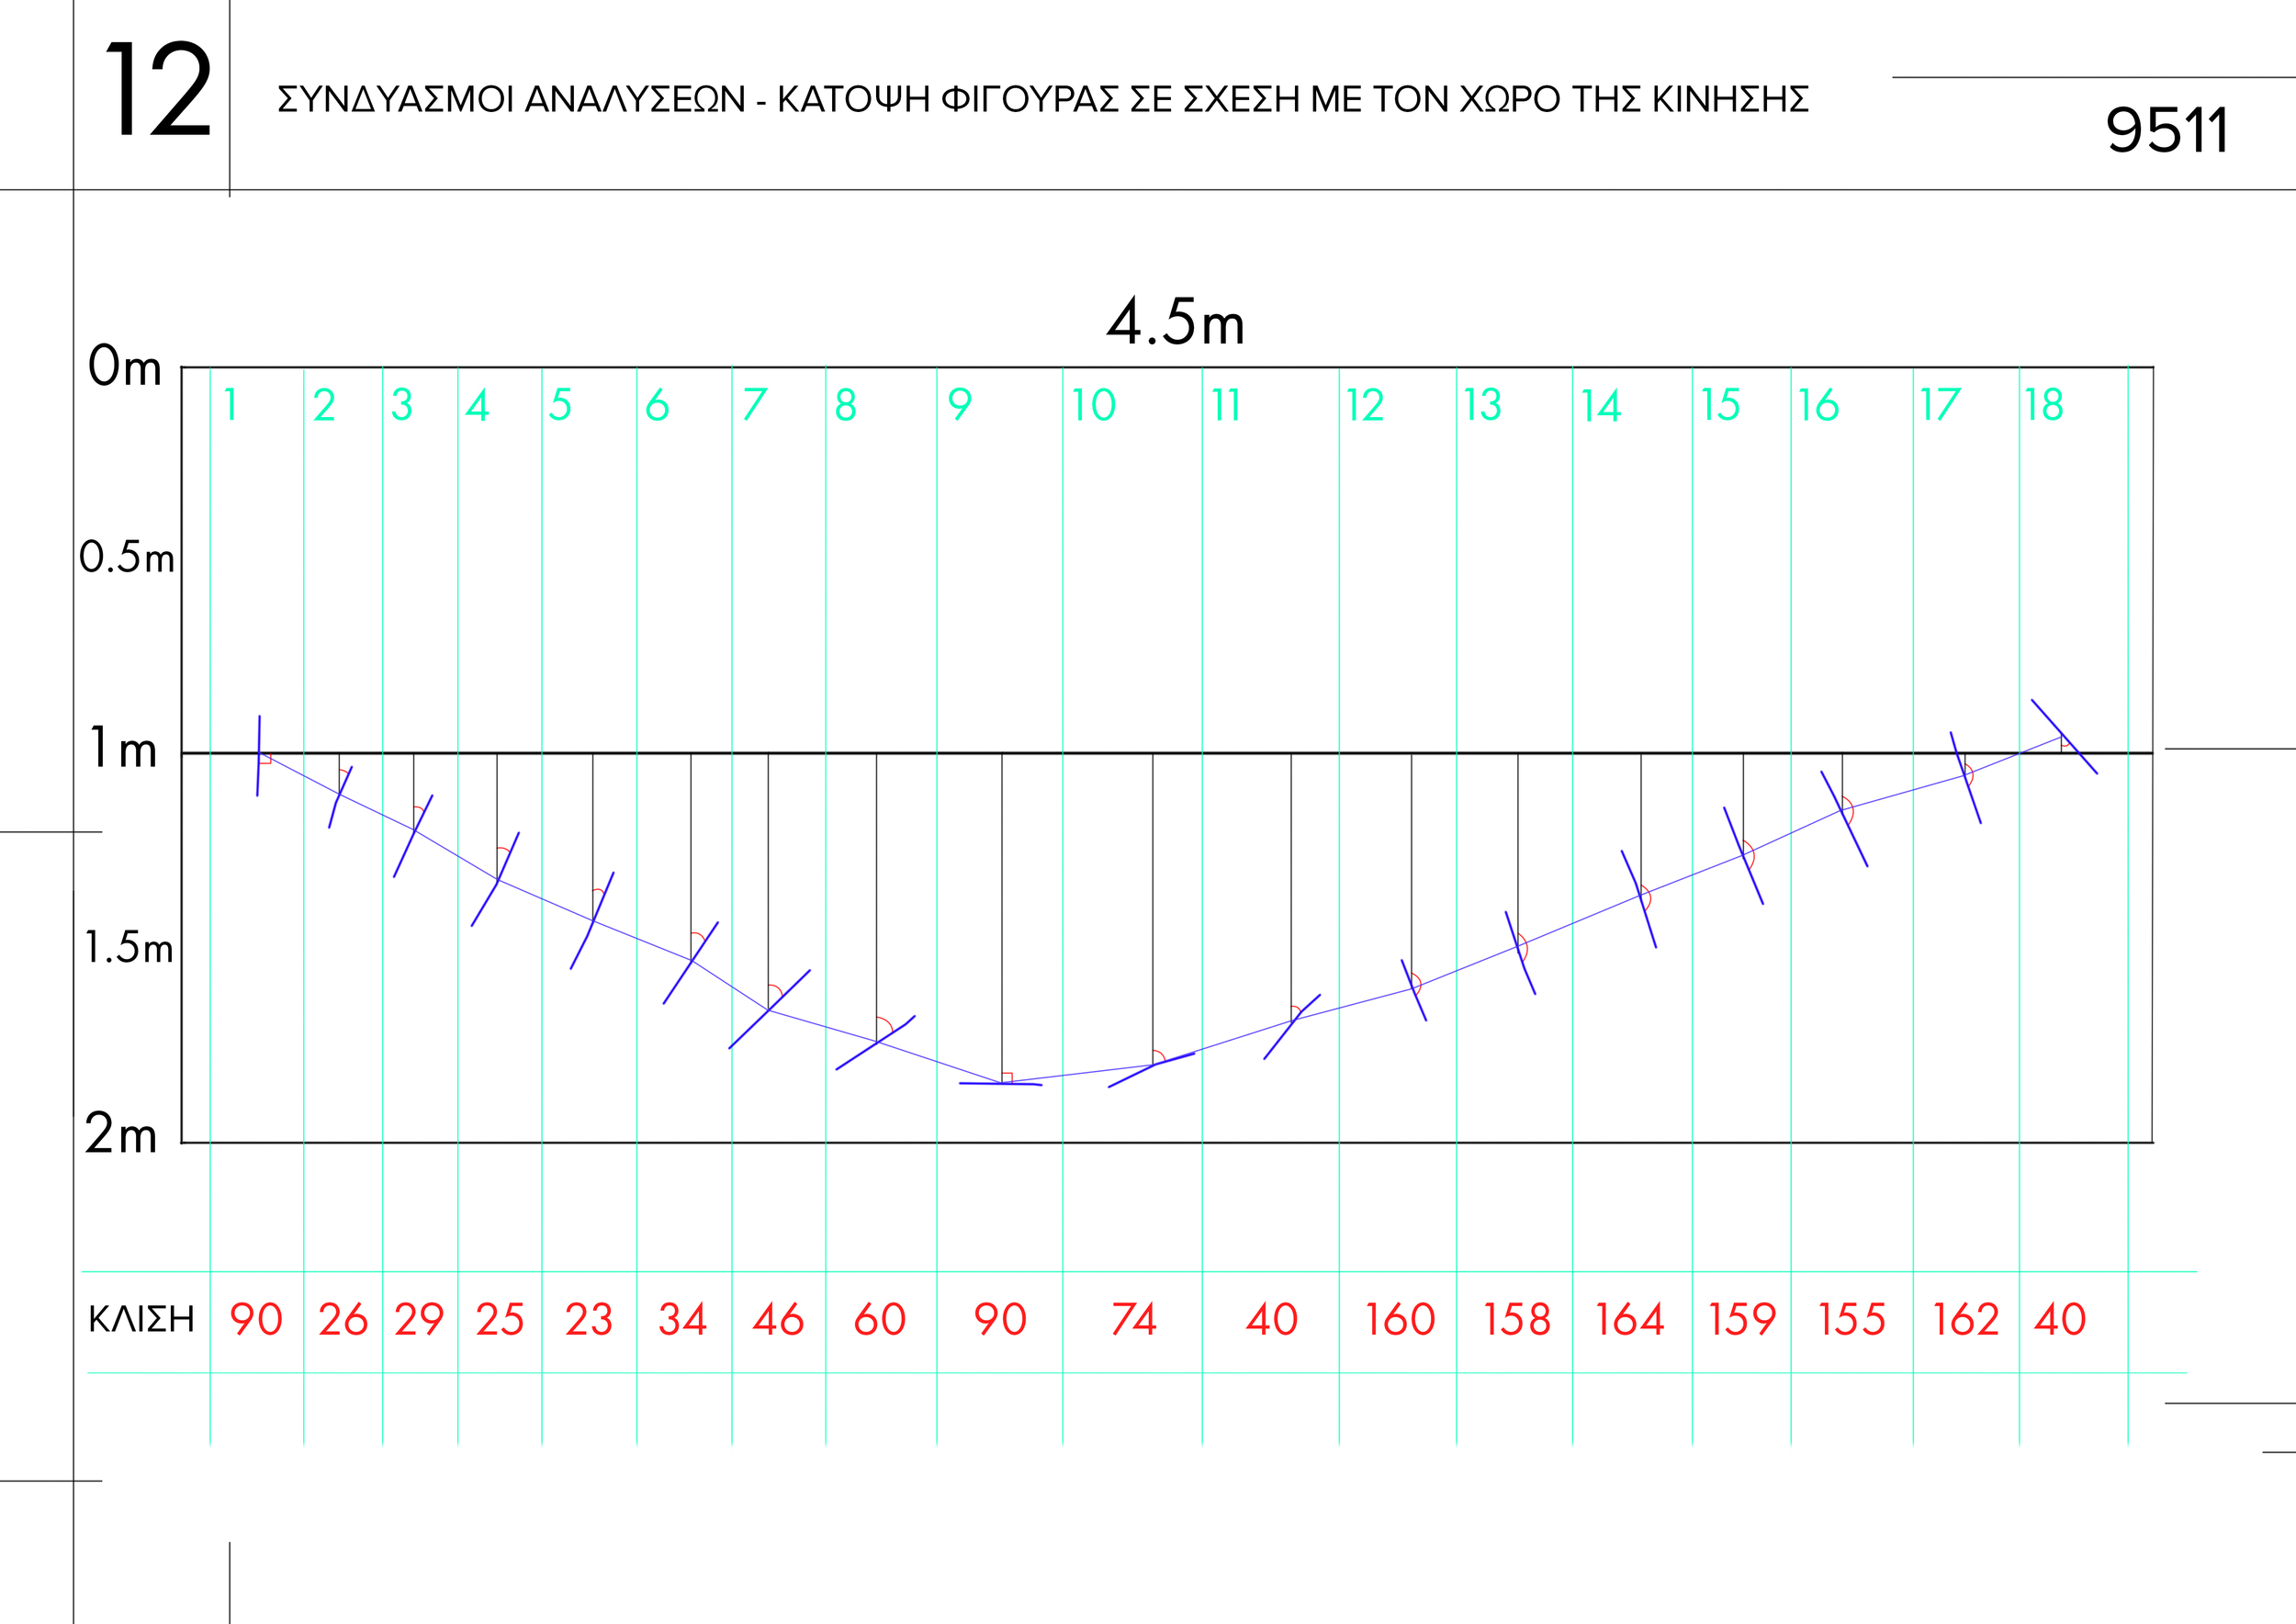
In slide 3 I illustrated the approximate distances from the ceiling and the floor and chart those to create a particular space. I then carry out a series of form reductions in 4 and 5 where I essentially reduce the figure to much simpler, deforming geometries by simply selecting points and connecting them together.
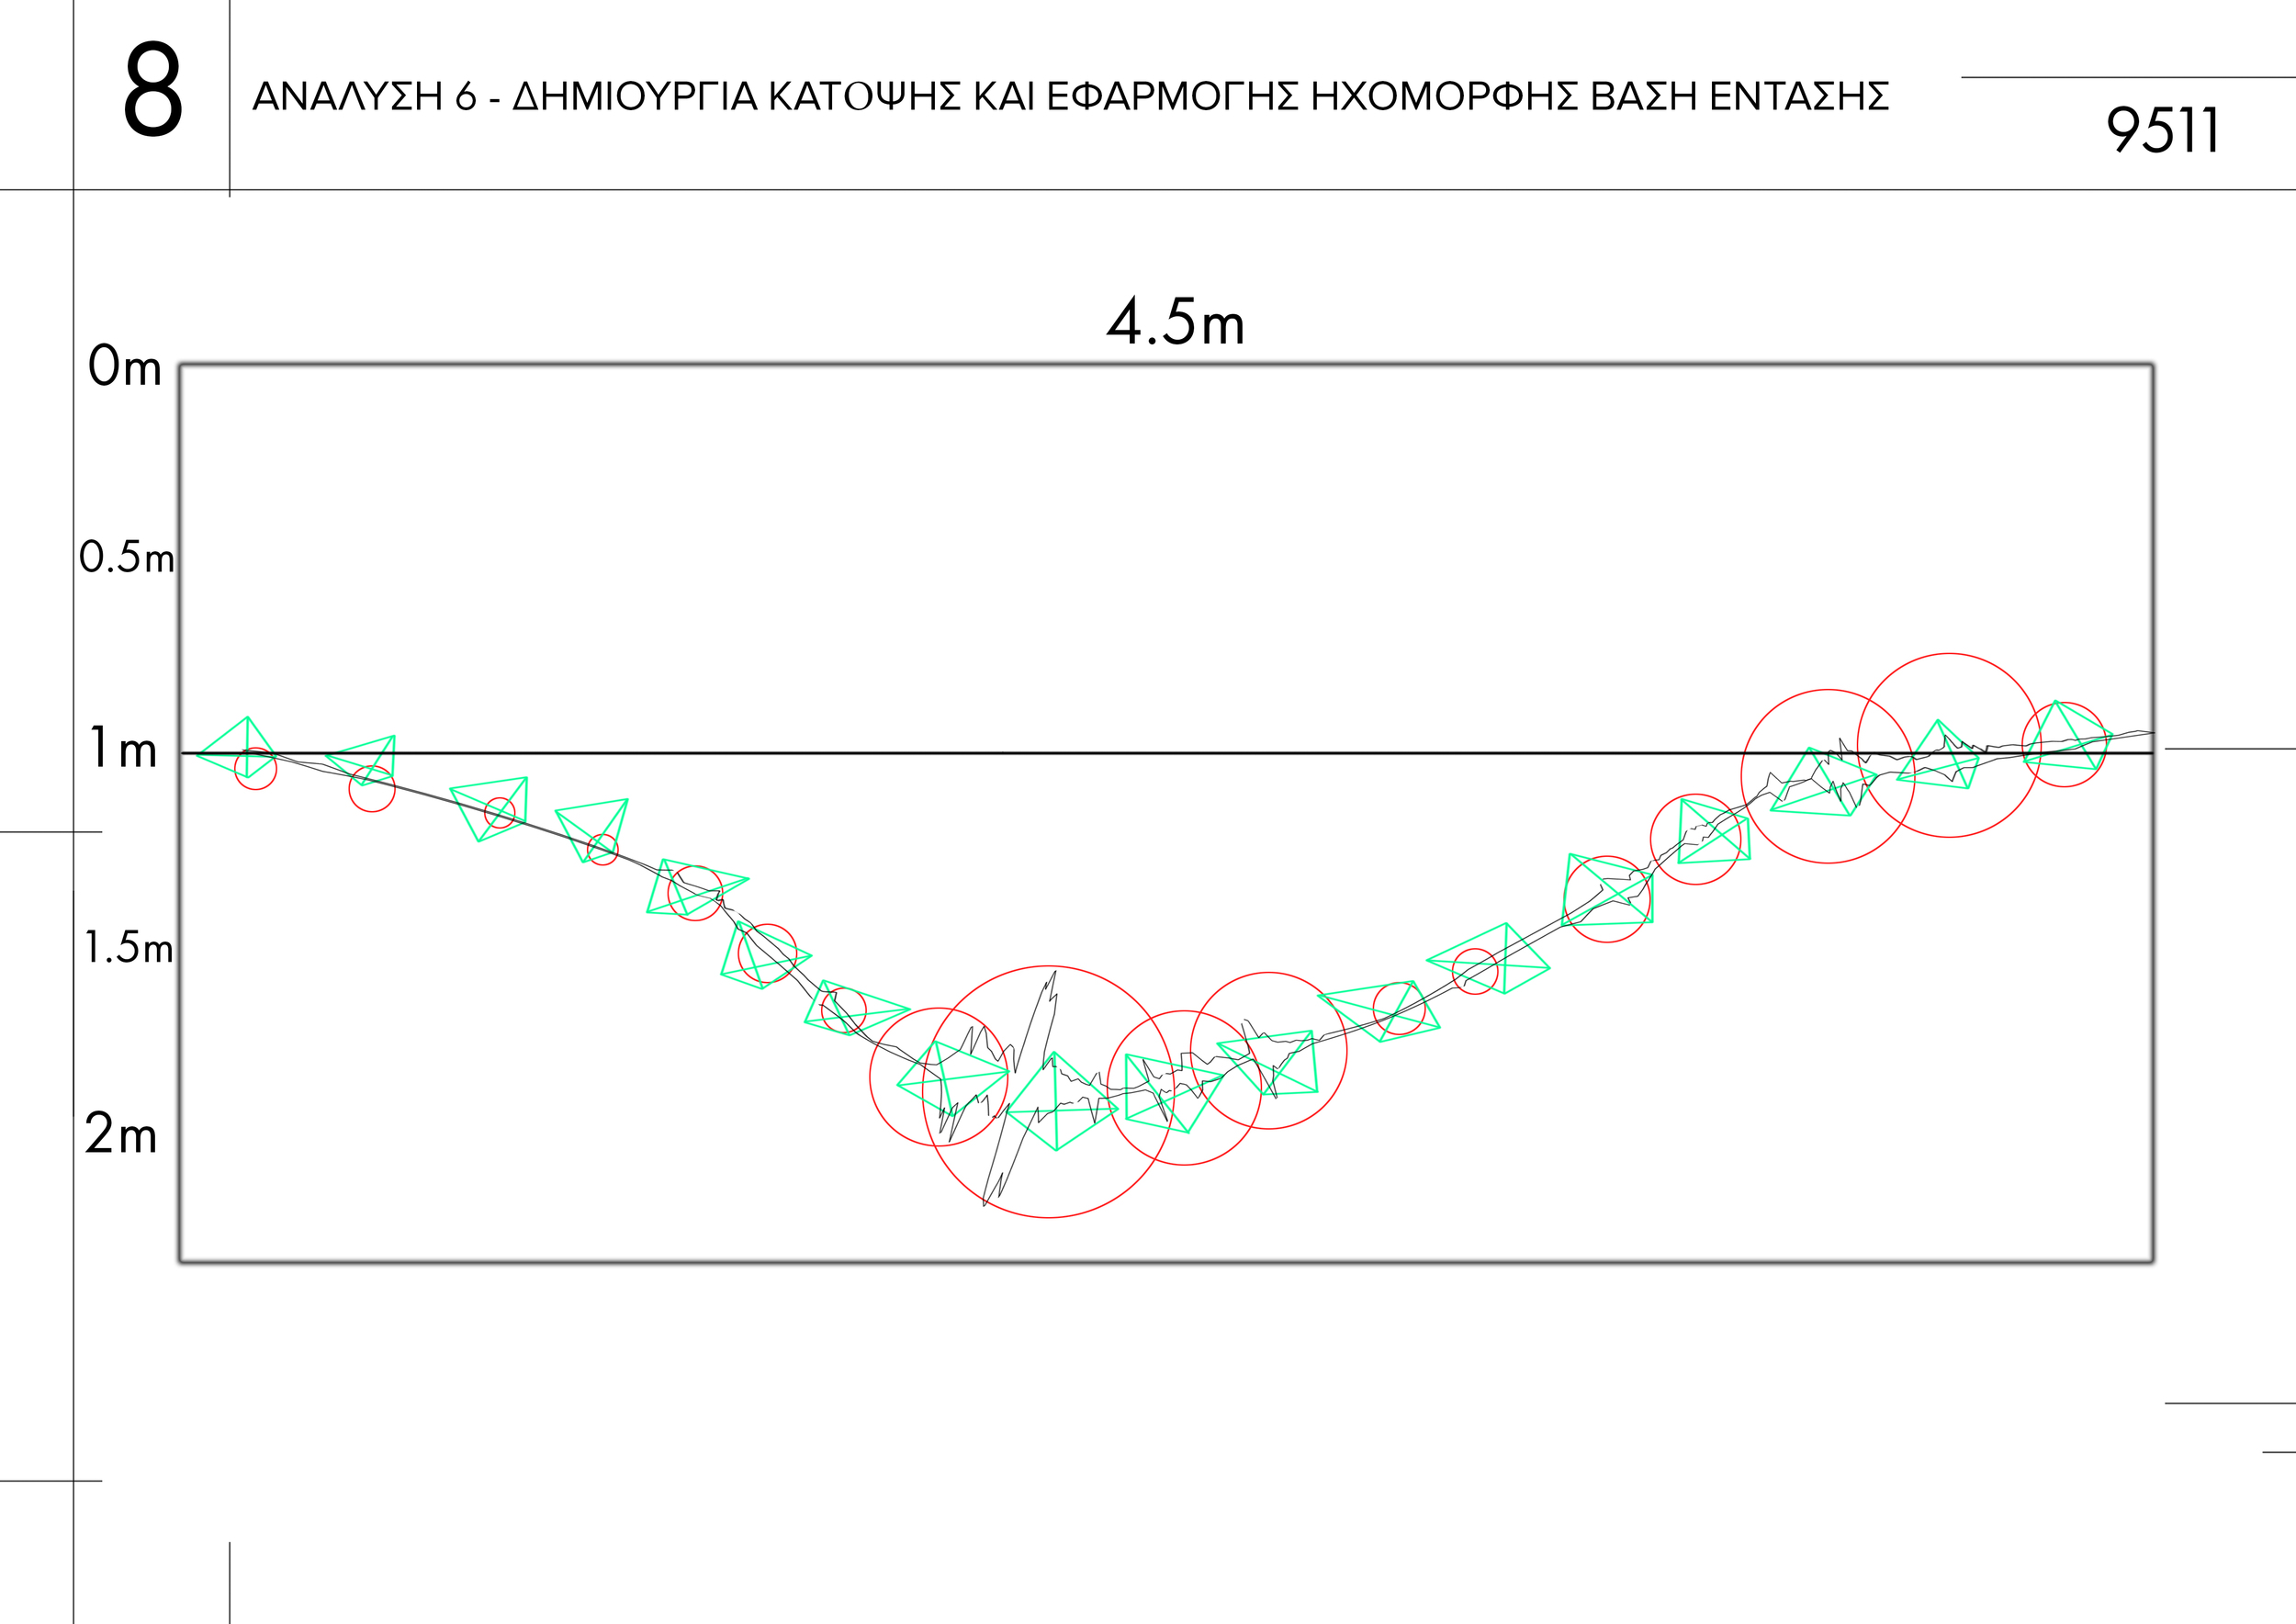
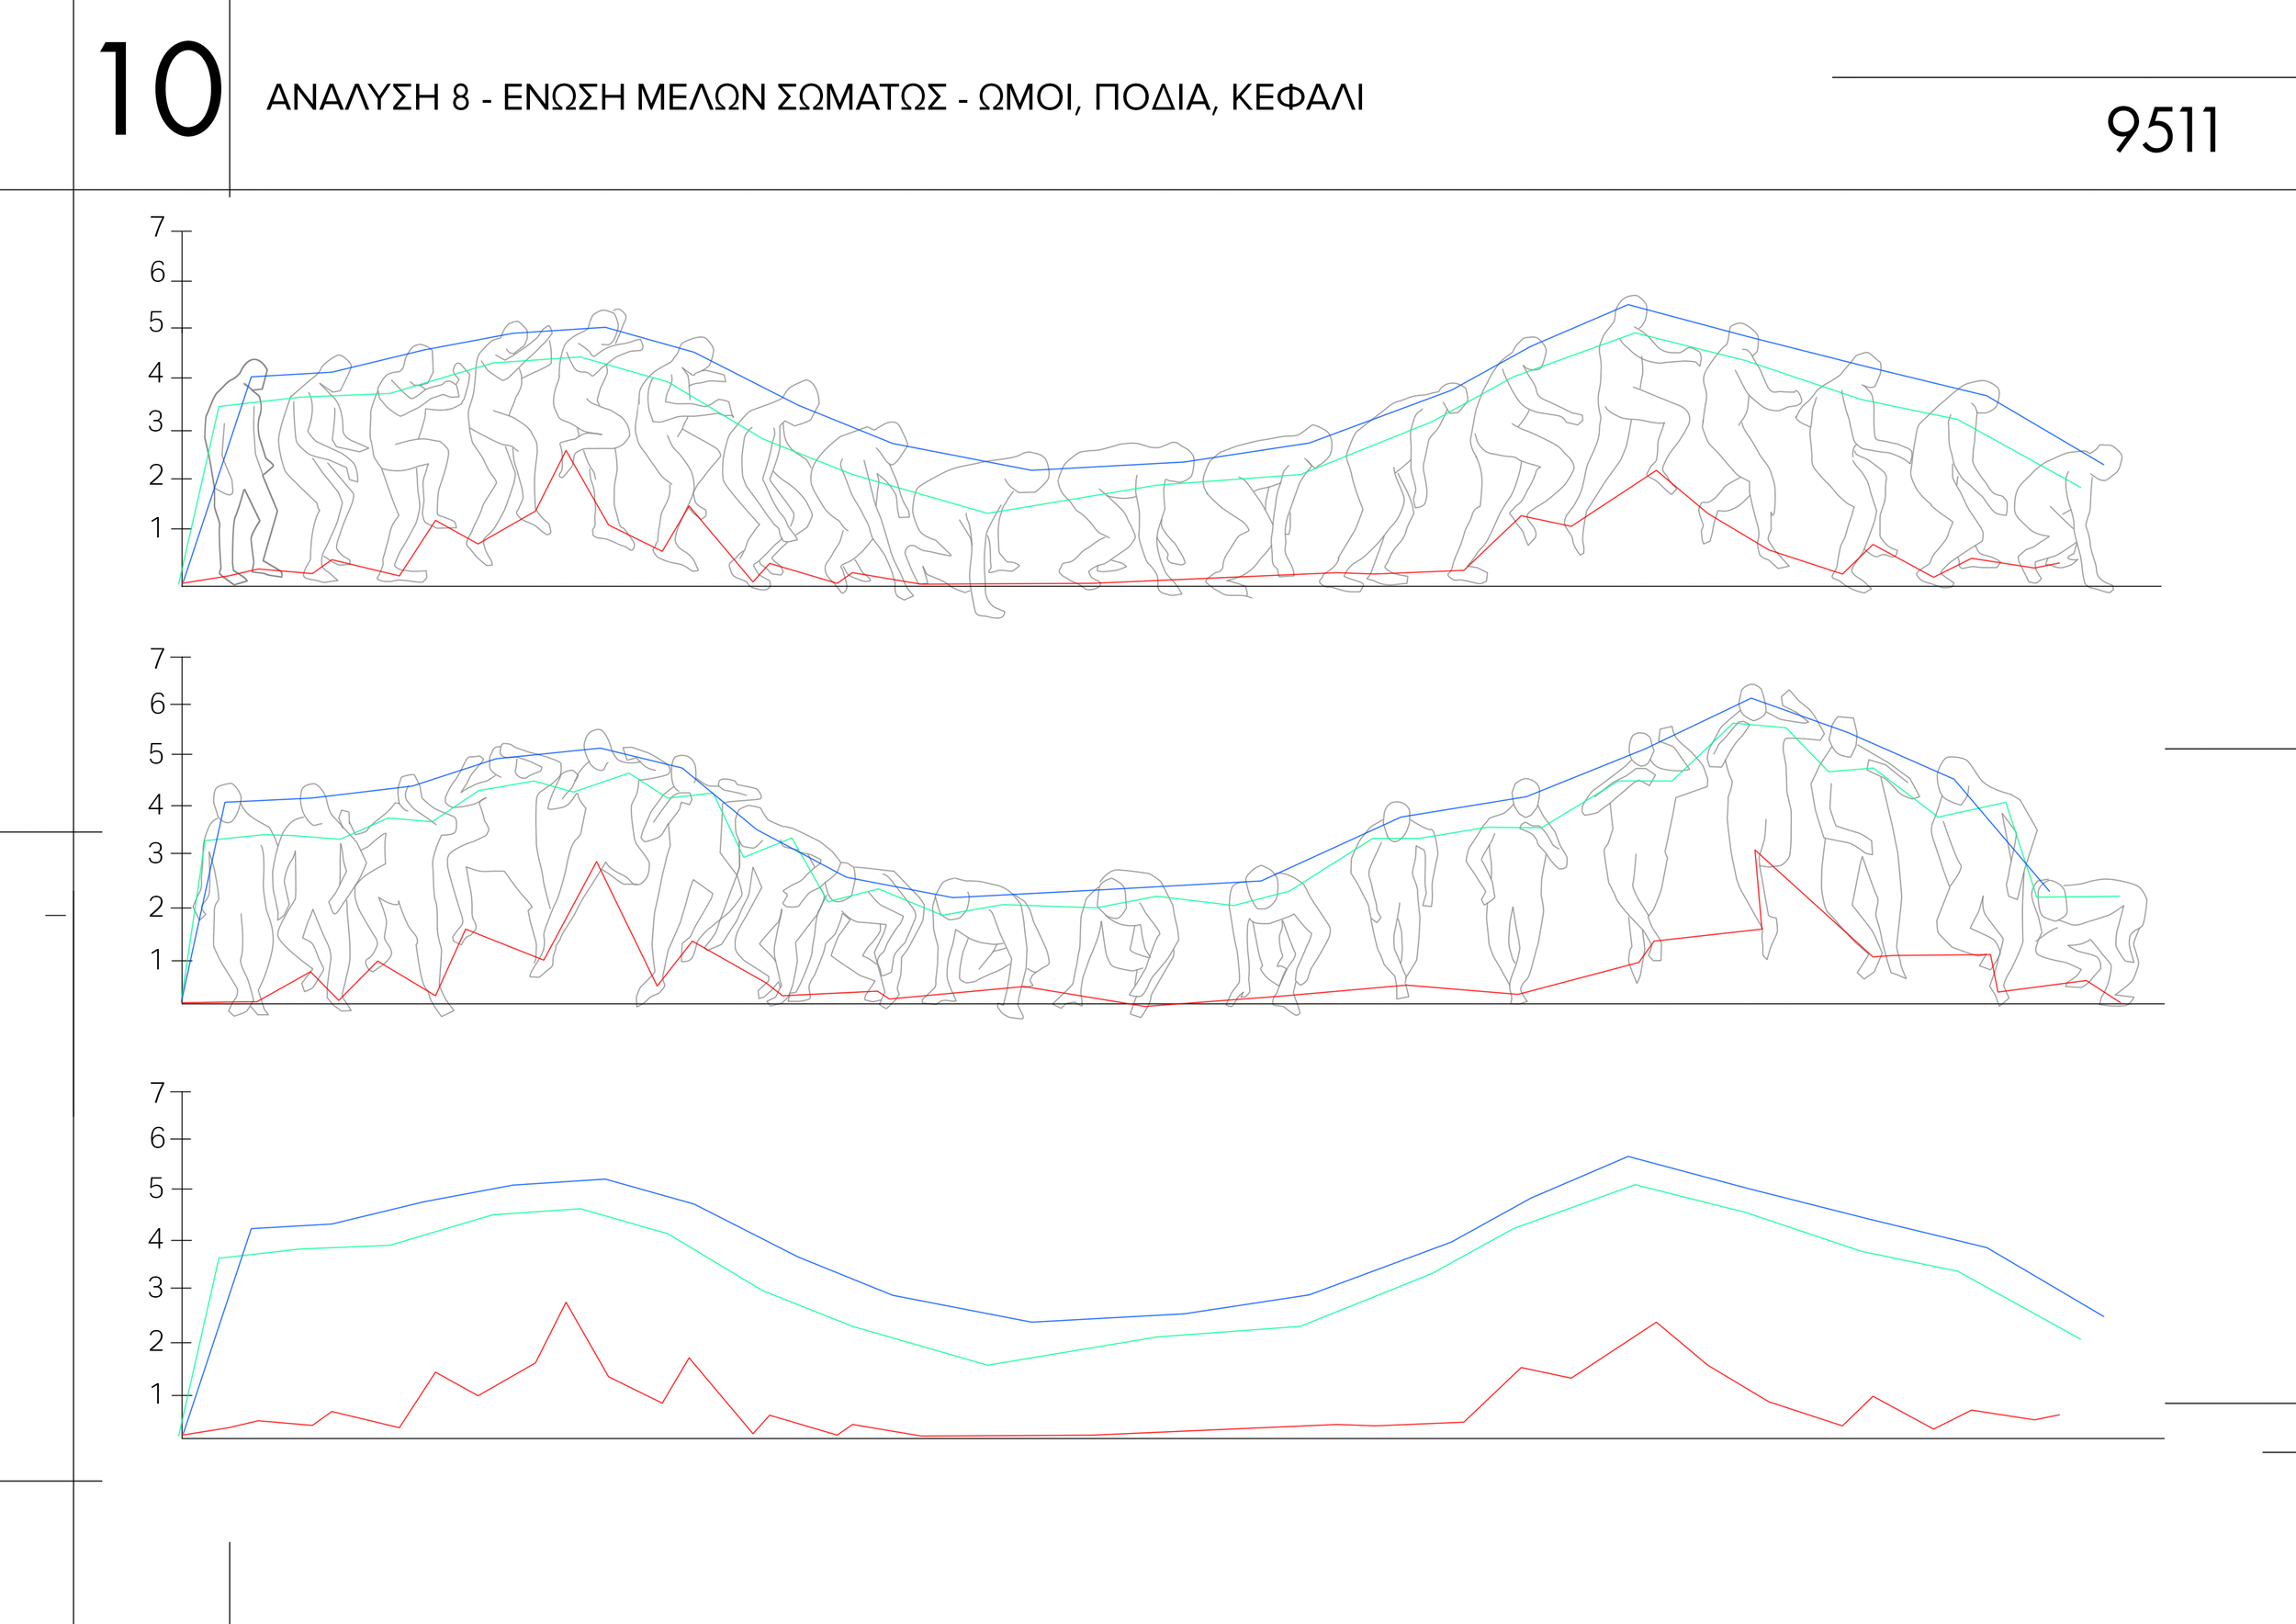
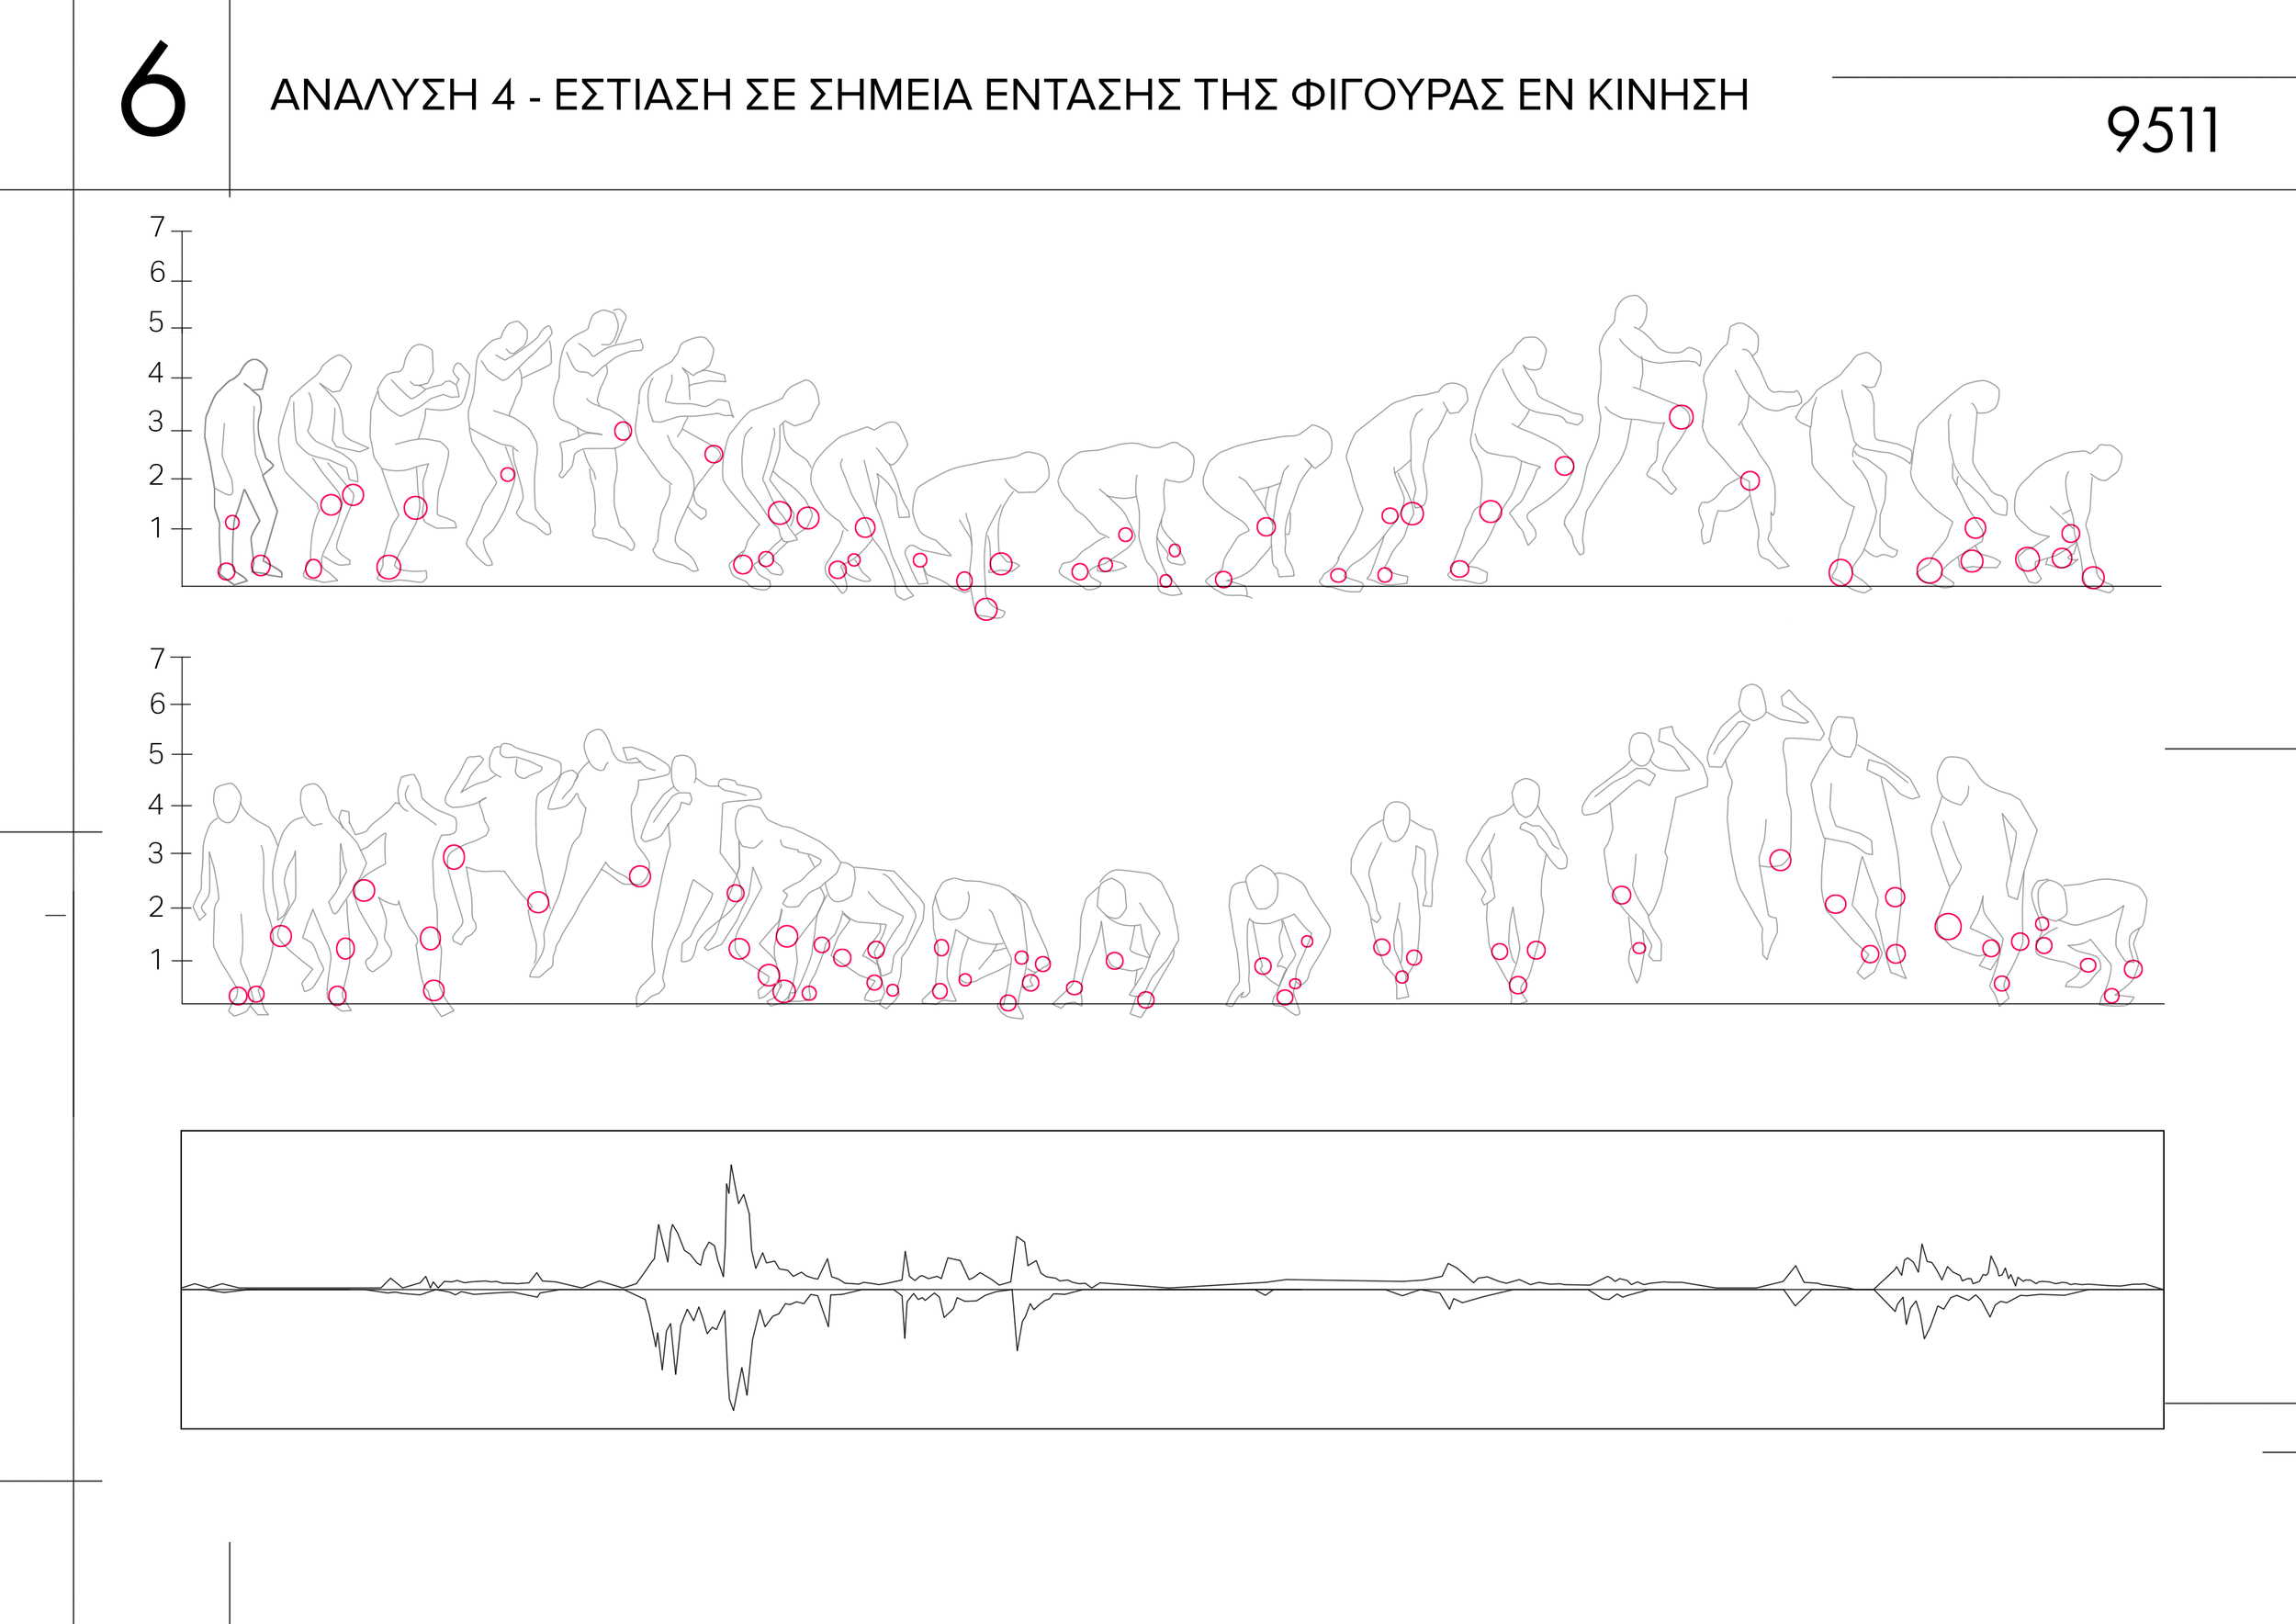
In slide 6, I took a different approach as I considered another factor besides the geometry of the shape - I considered the stress points within the body of the figure throughout the movement. So when landing in figure 7, the two knees and the feet are under stress as they absorb the shock of the landing. I've featured these two on their own in the slide below.

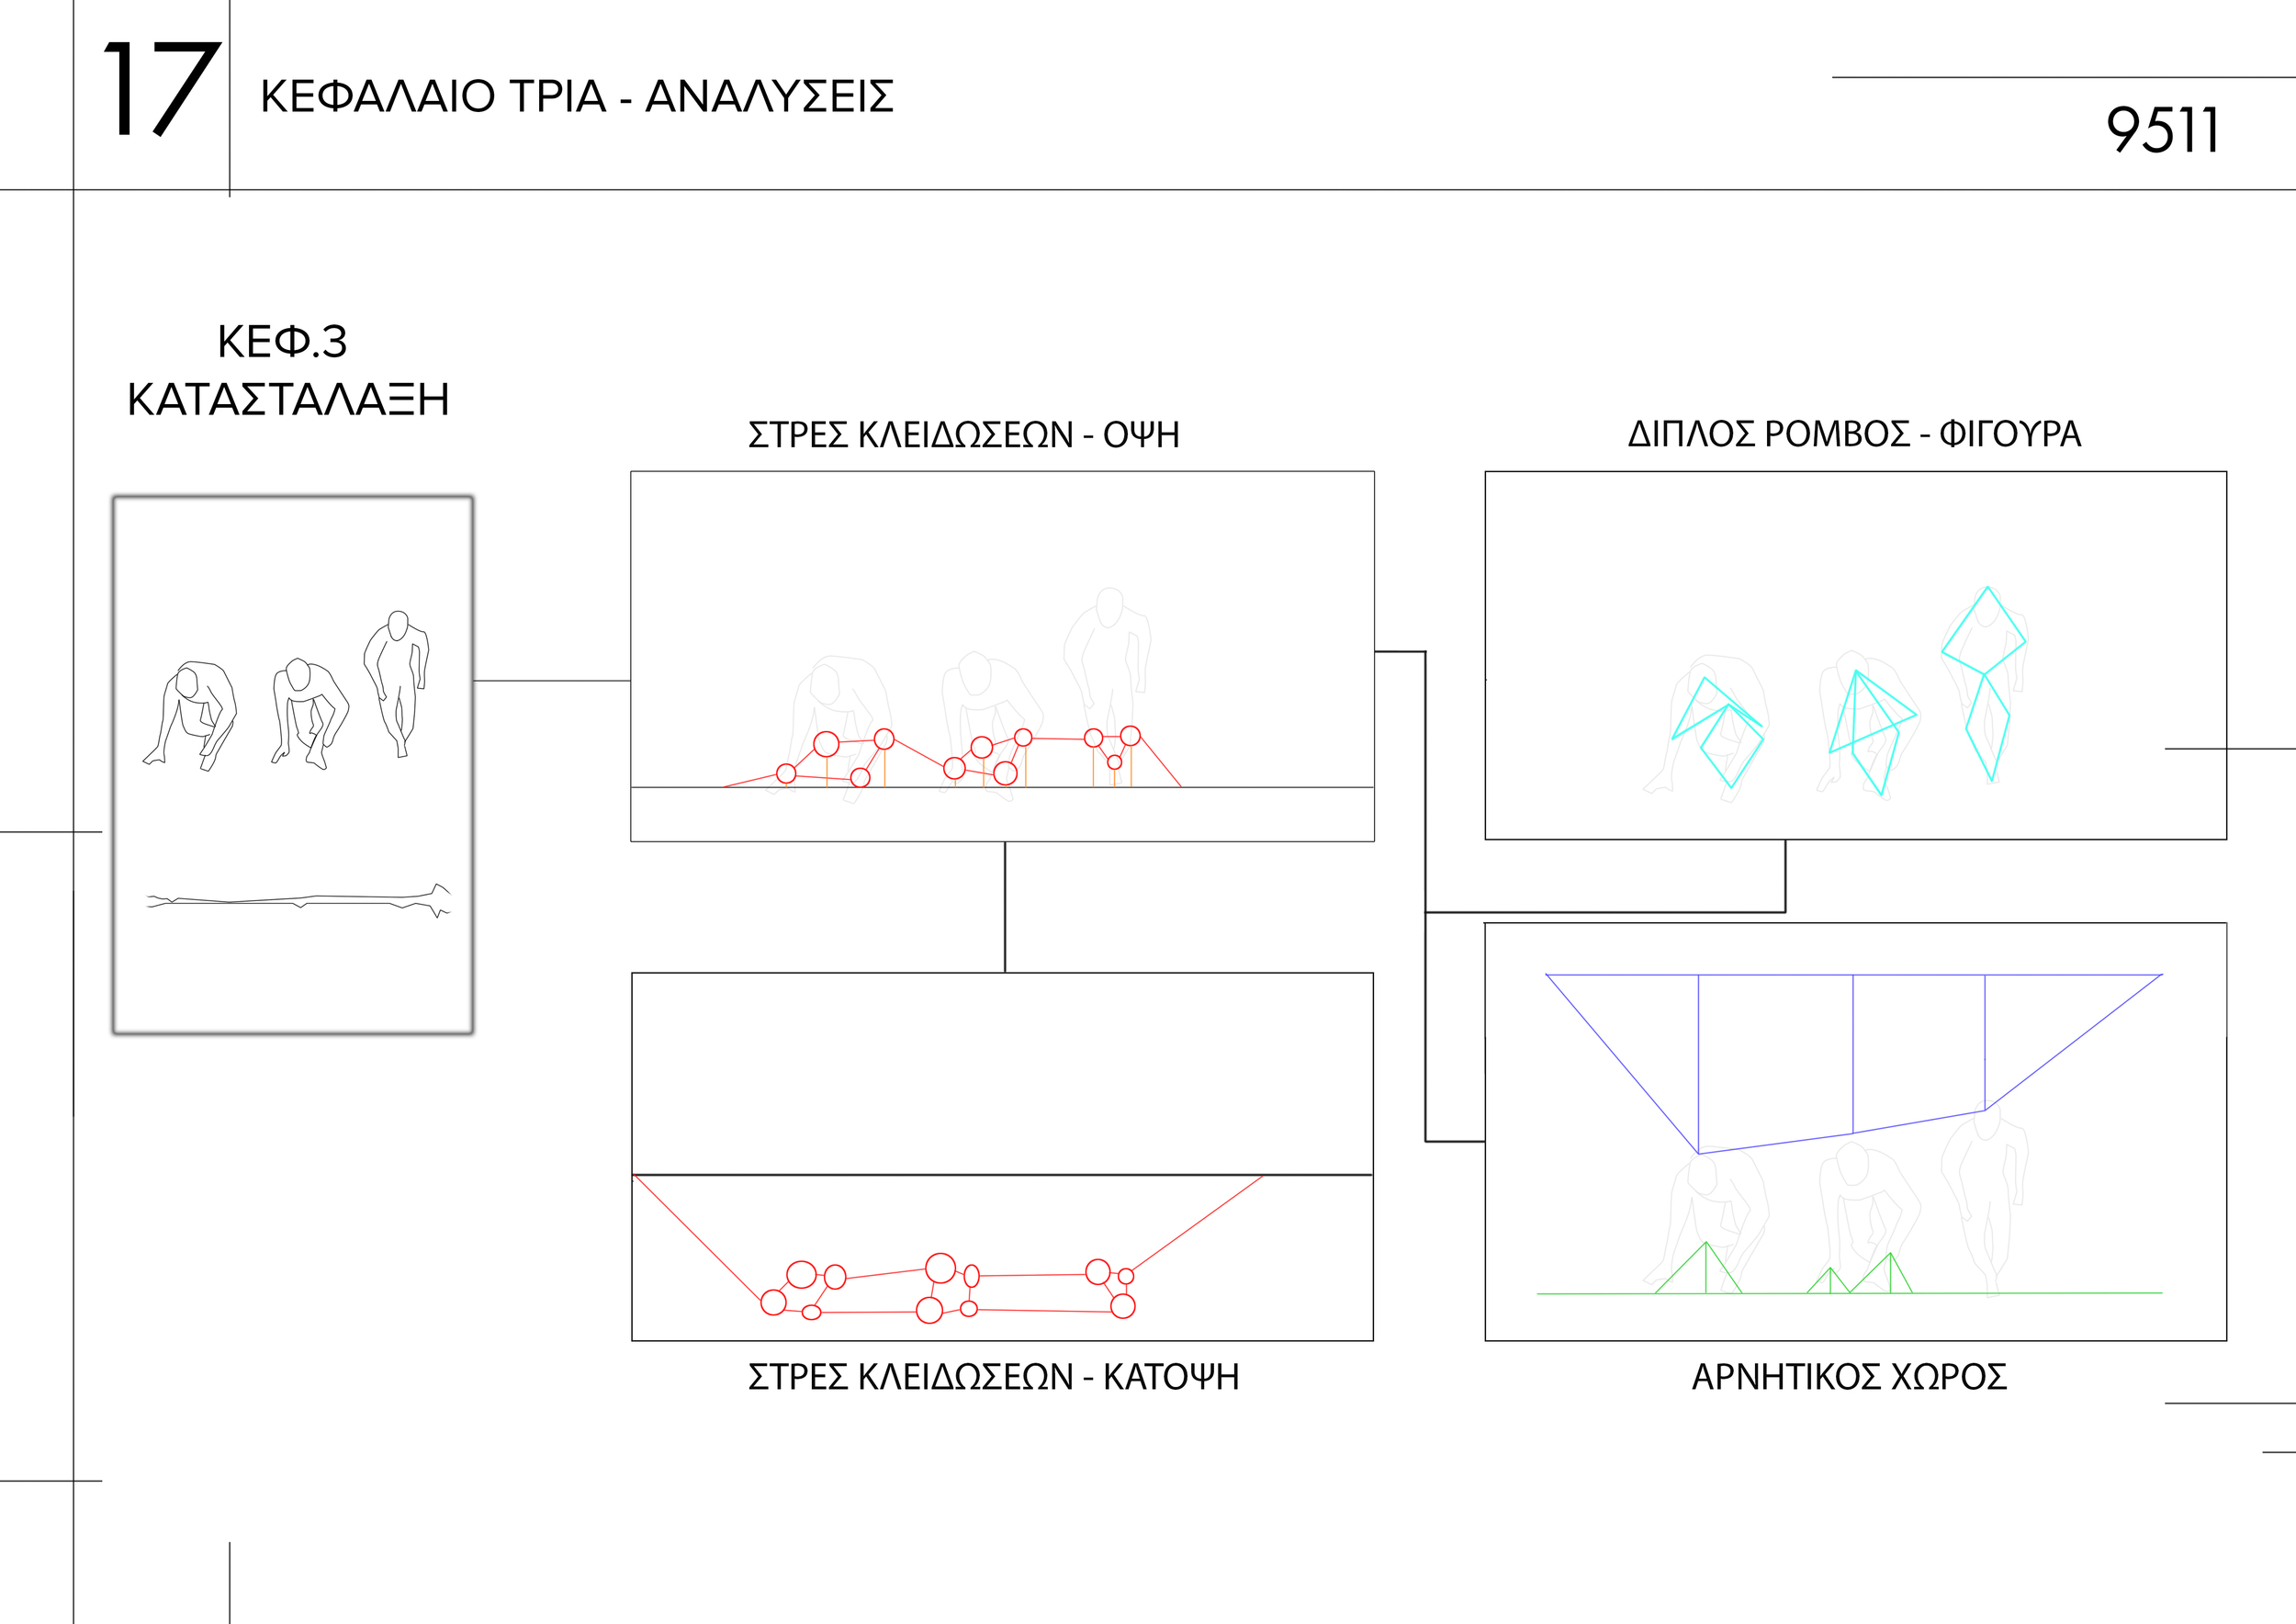
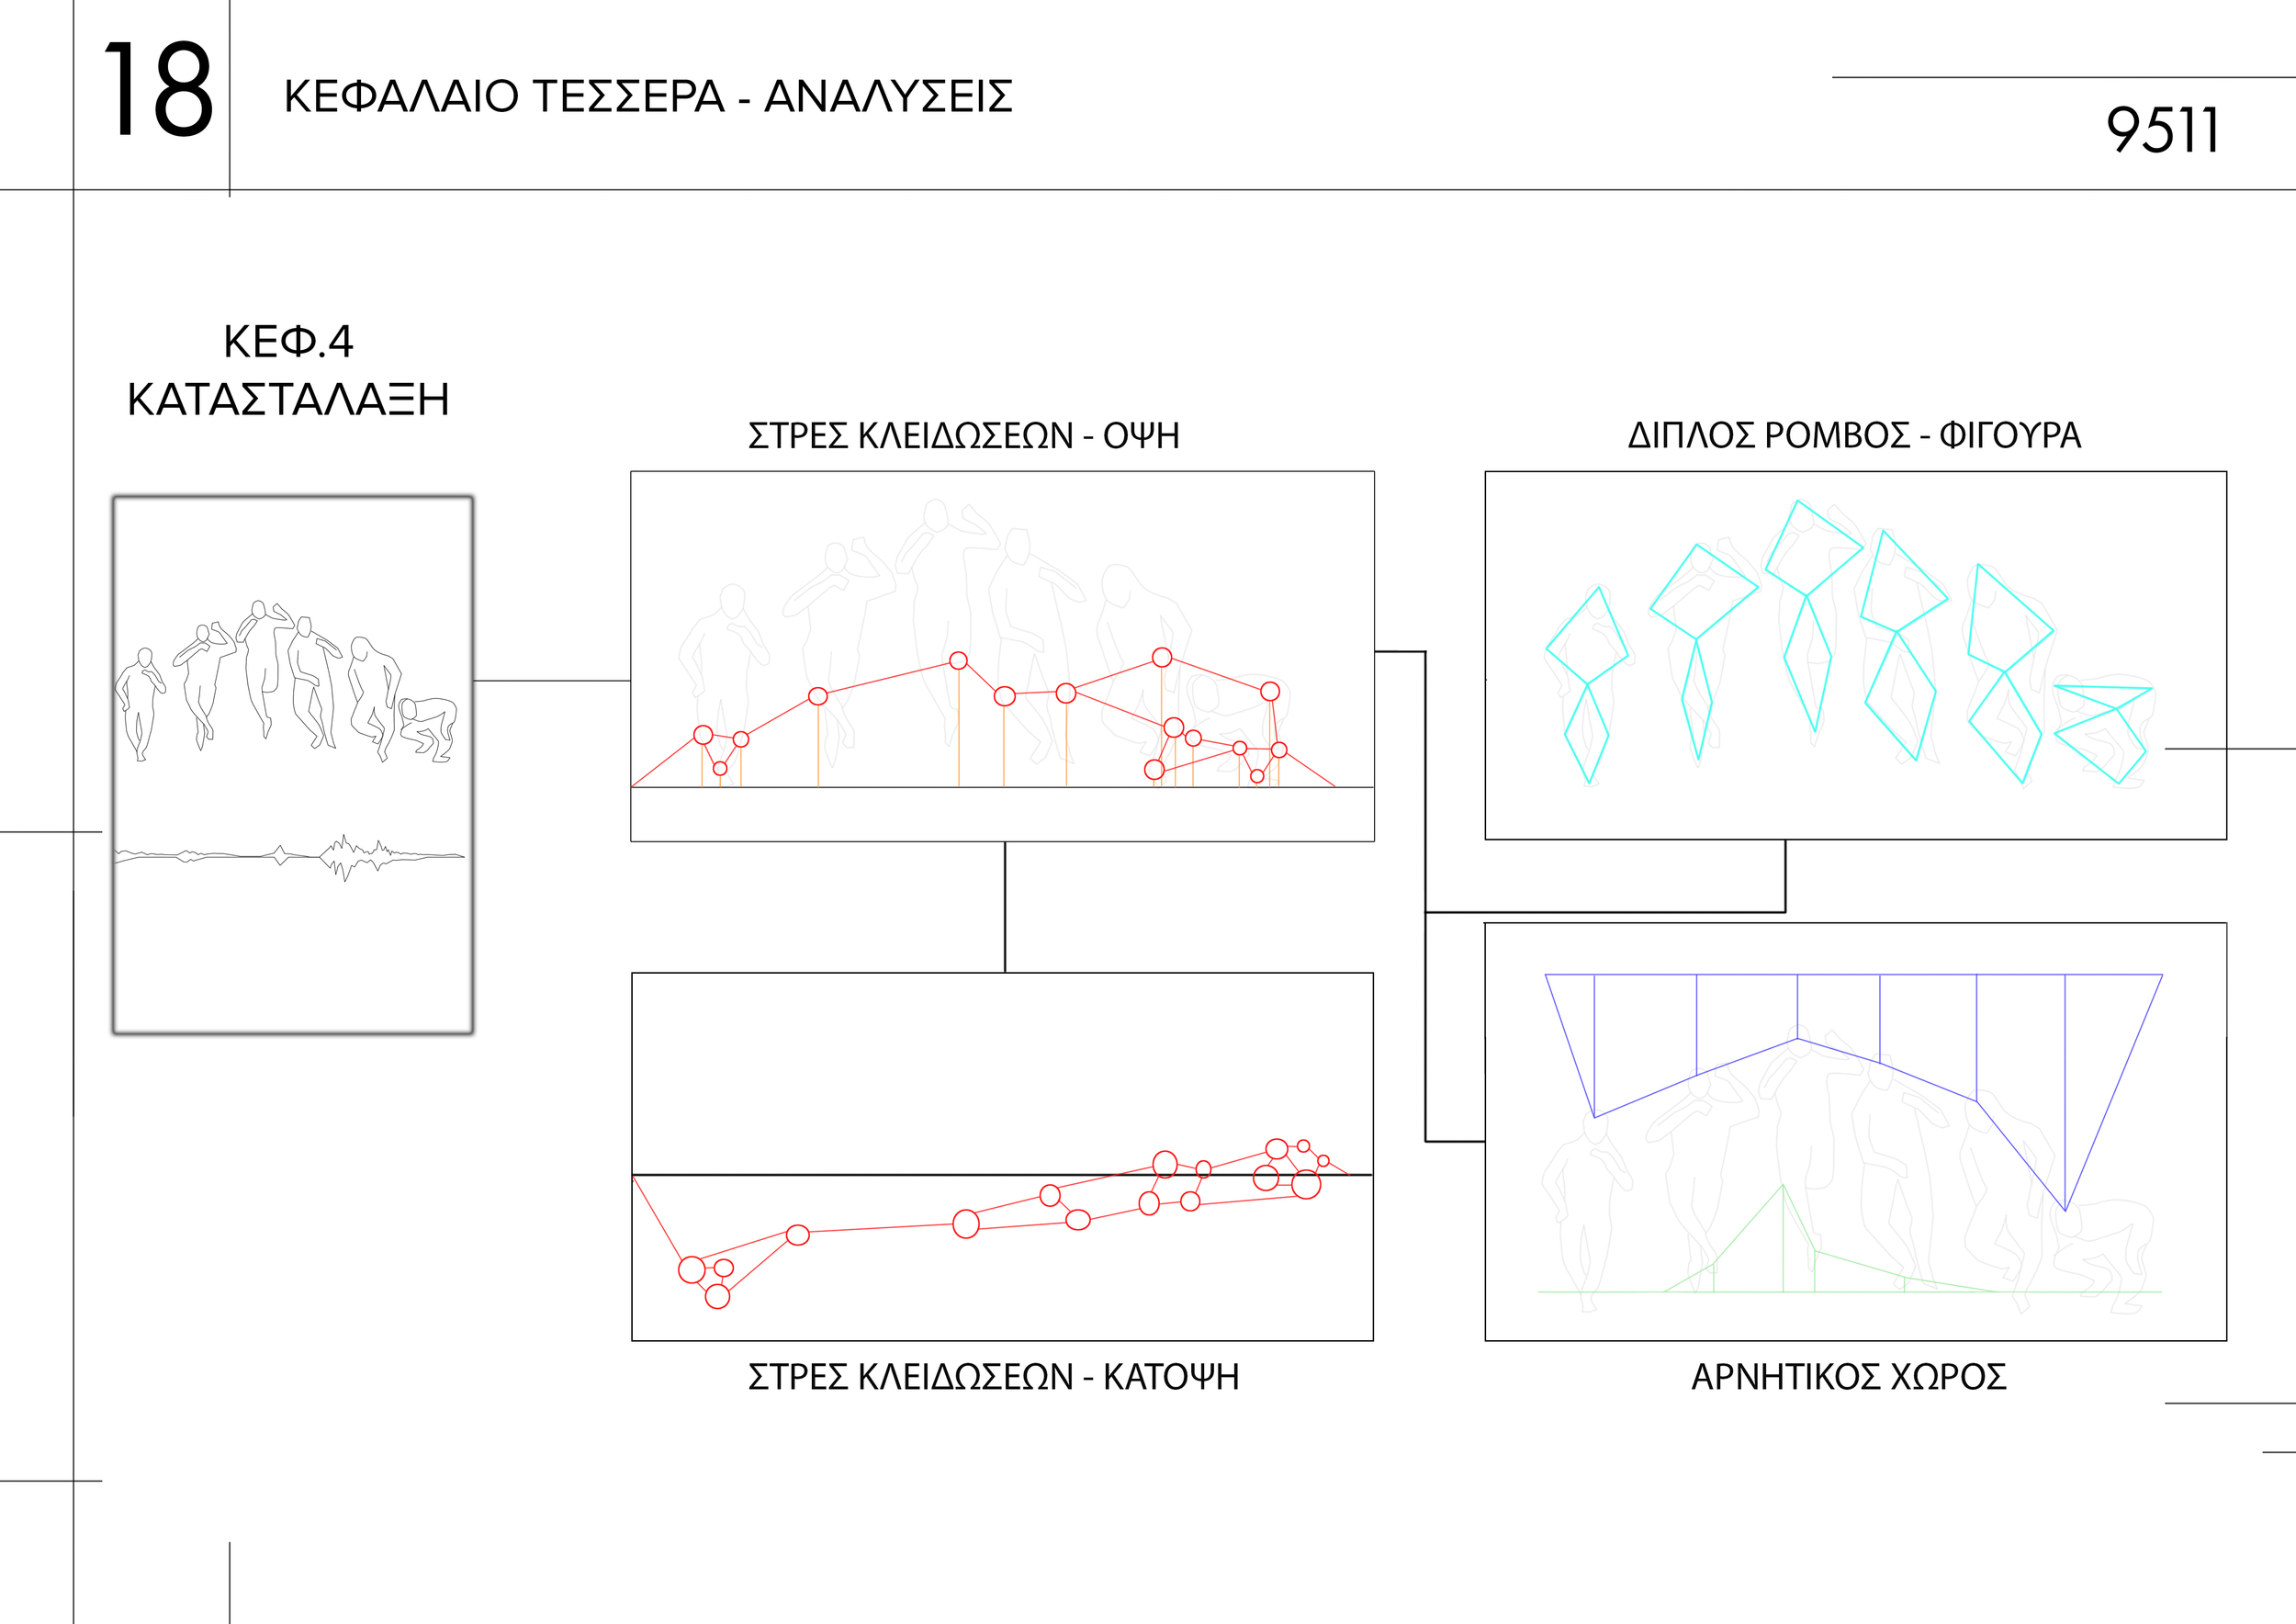
Slide 19 in the above slideshow illustrated the connections between the stress points and also illustrates a top down perspective on the movement, again based on the points of stress.
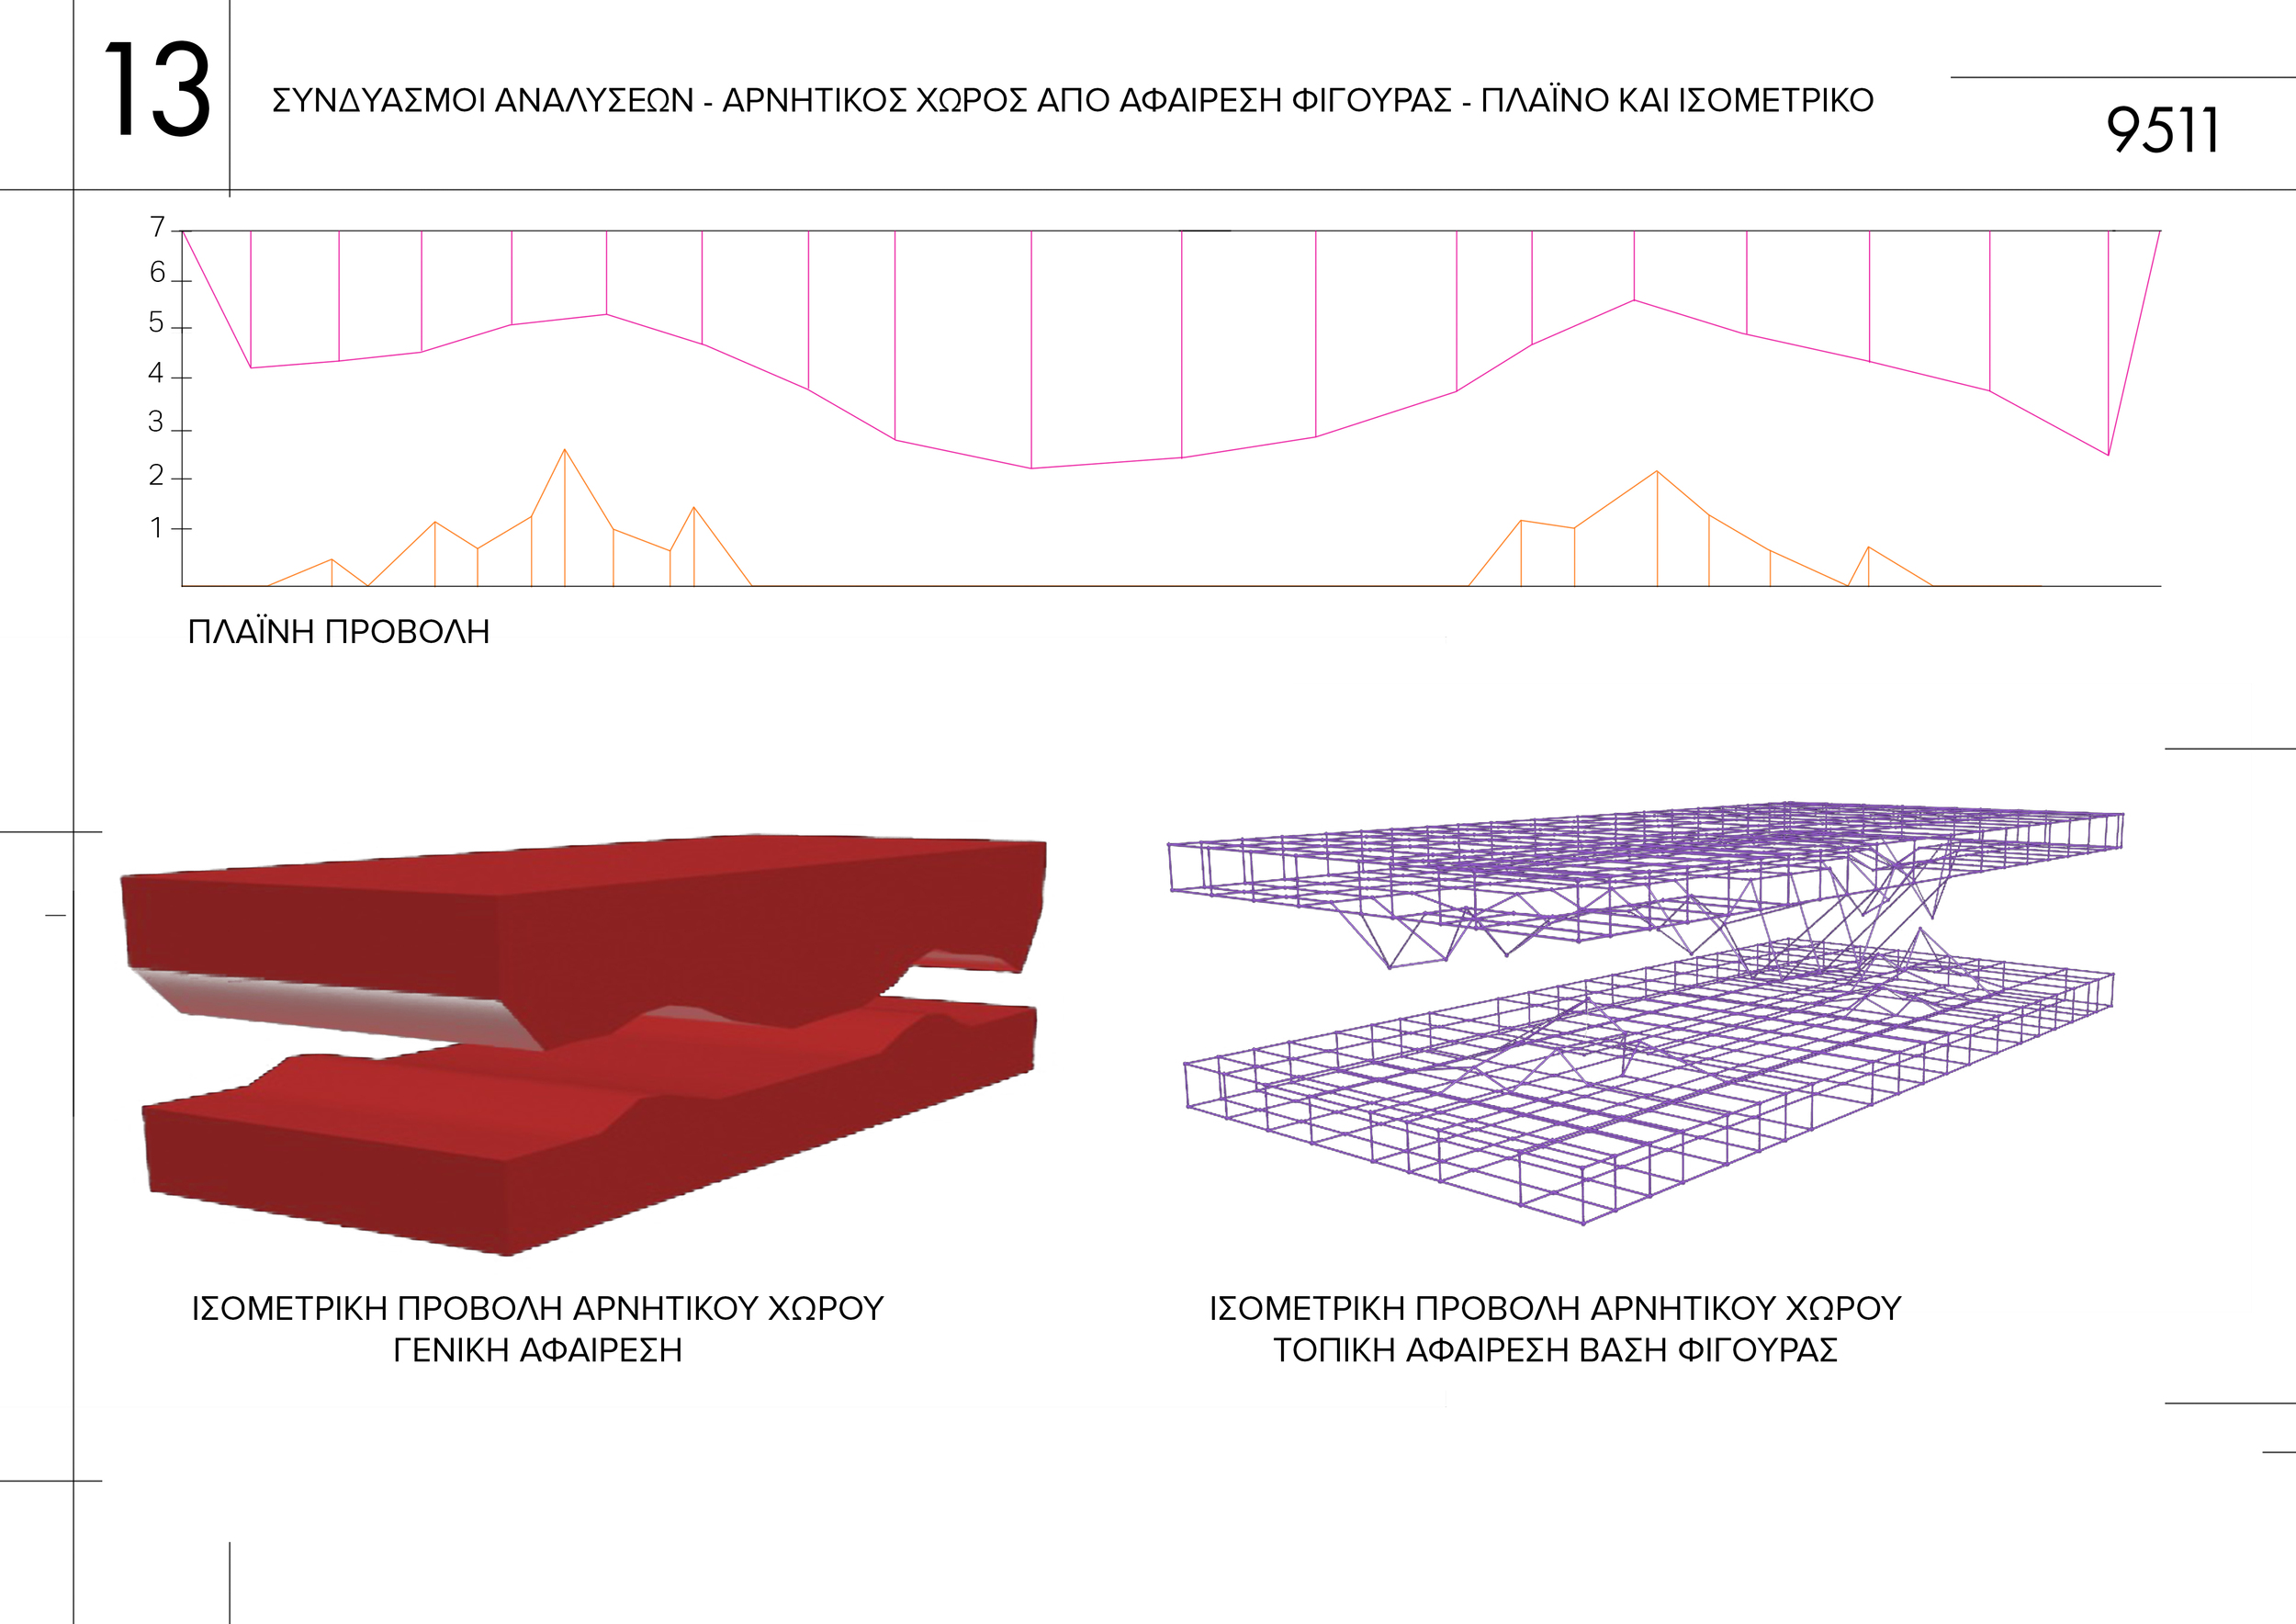
Another deviation from simple point tracking and reduction was considering the absence of the figure within the space - I gave form to the negative space. It was also the only one of the analyses that I generated a 3d visualization of :
The overall thought process involved considering the area traversed as a solid volume and the figure as a plane cutting through that volume. The bottom left diagram illustrates this pretty clearly, while the bottom right one follows the idea of a more localized displacement of matter.
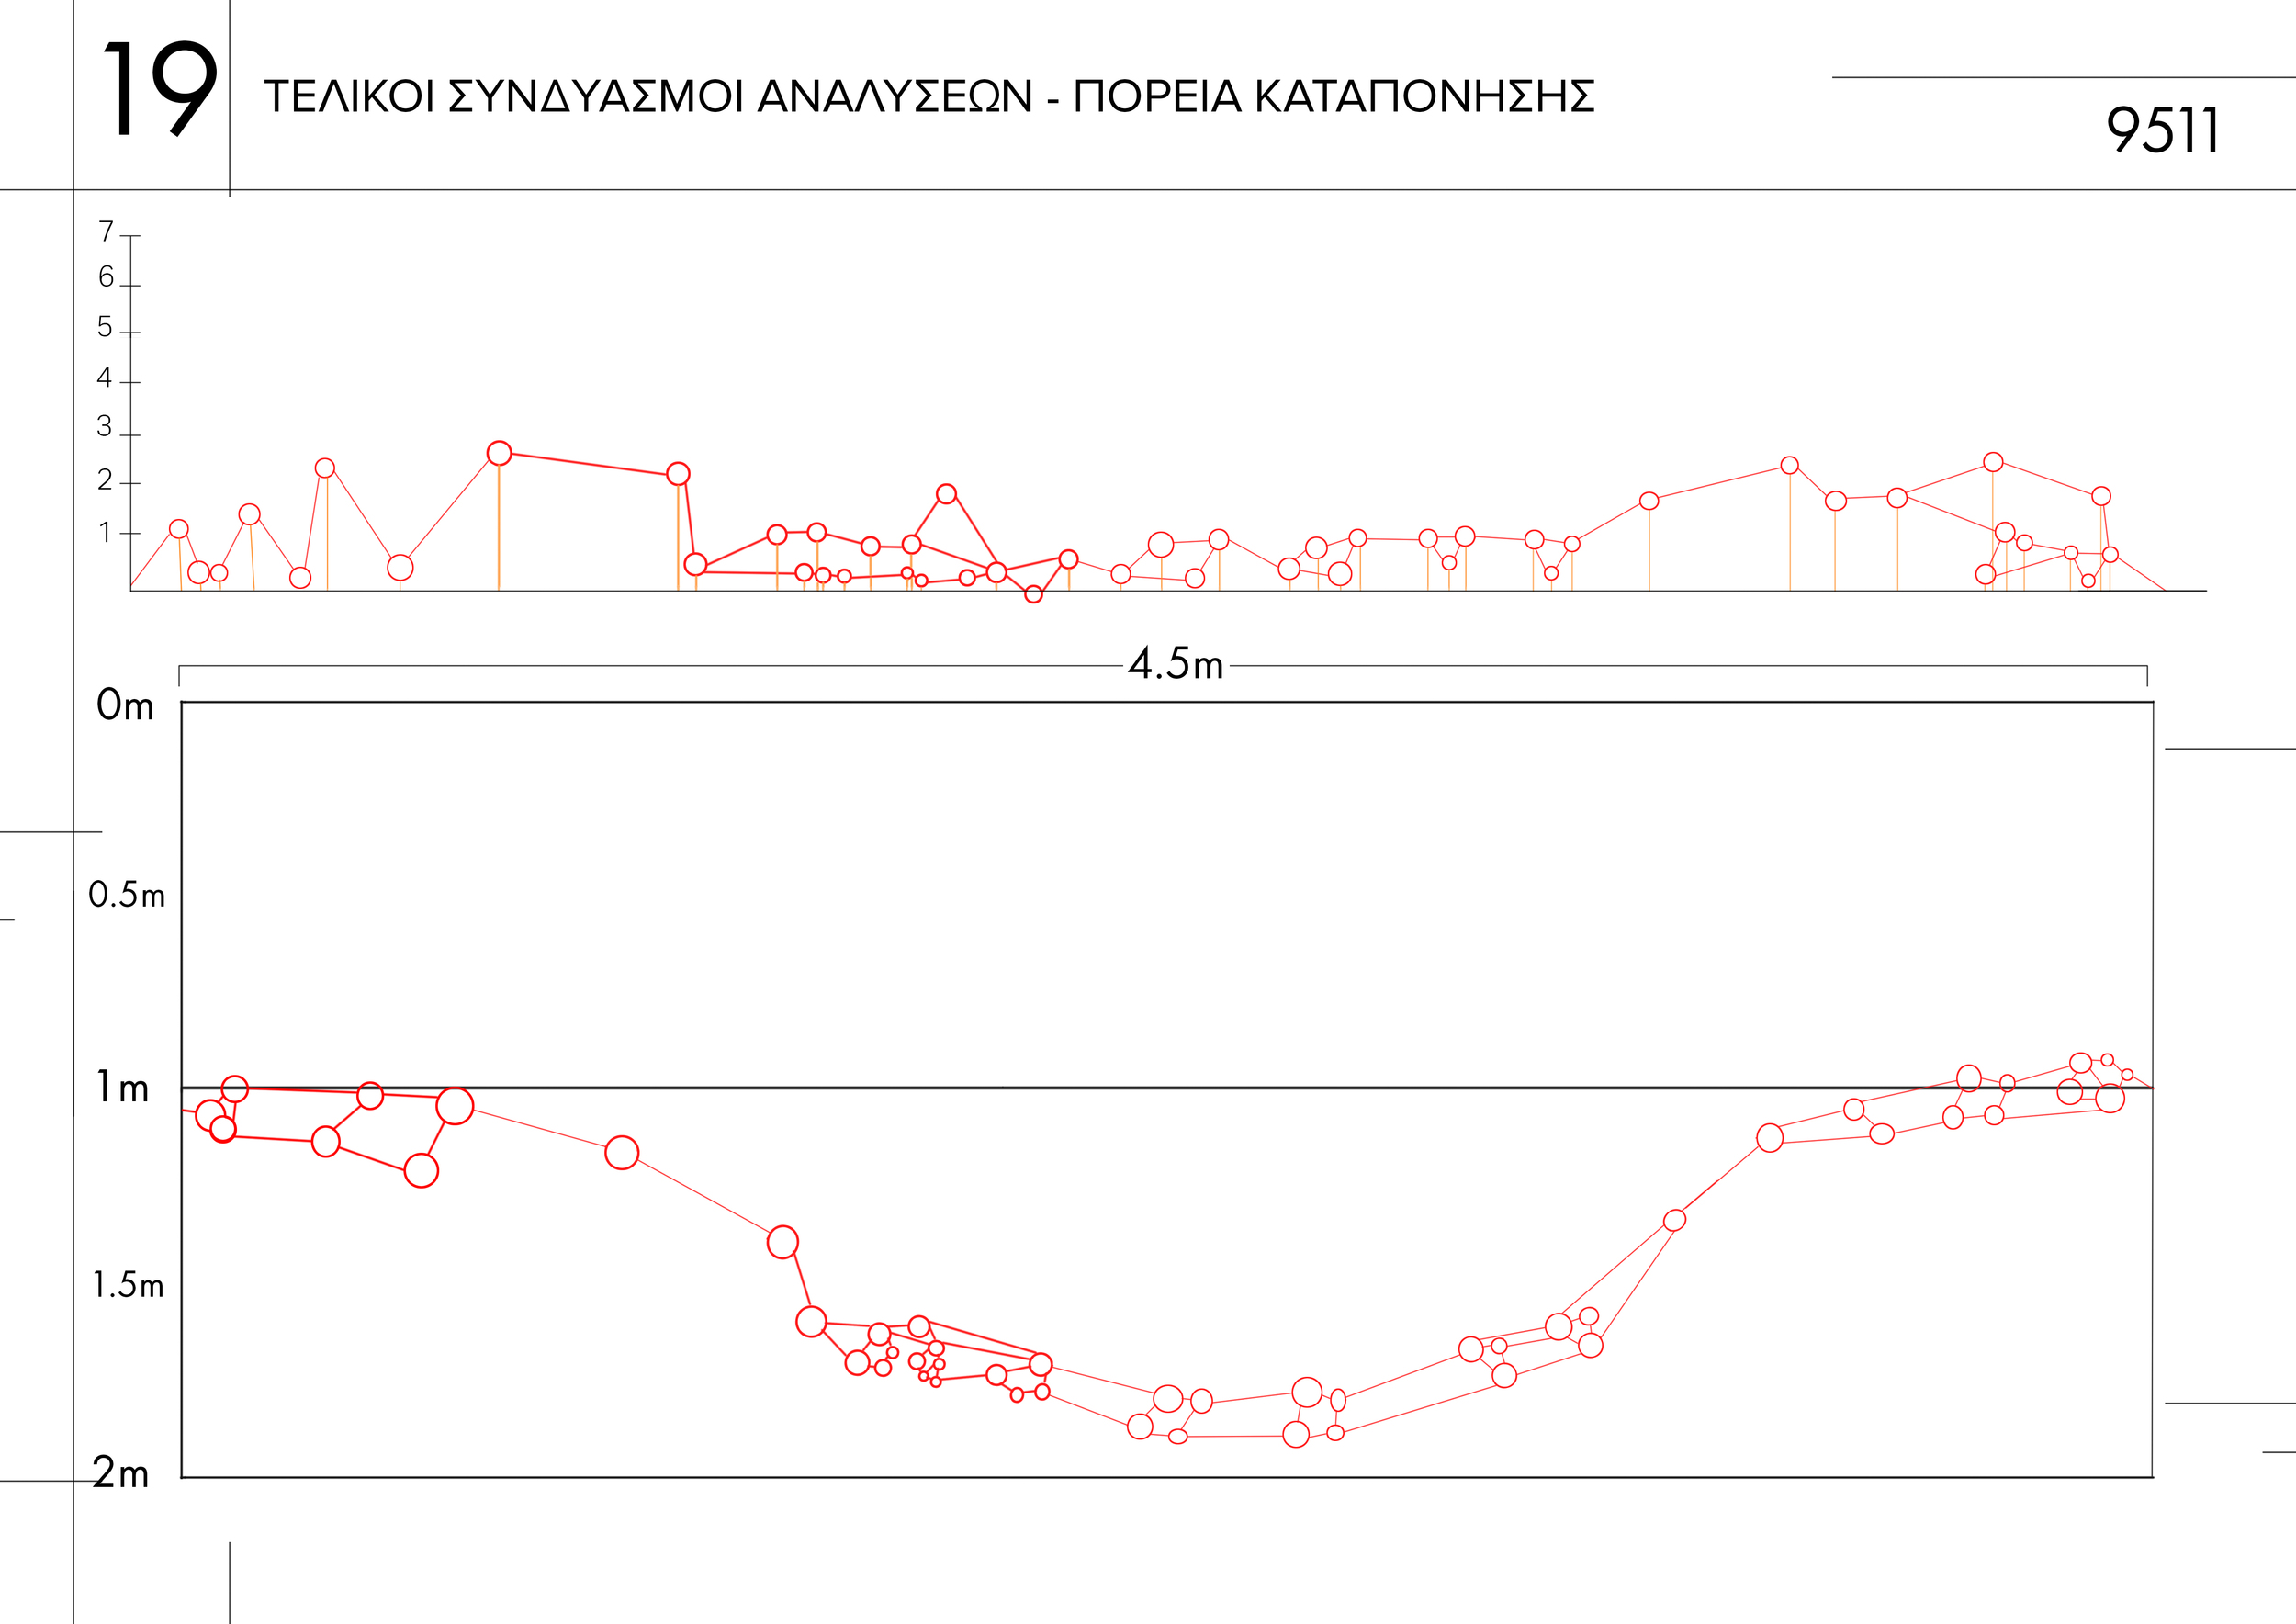
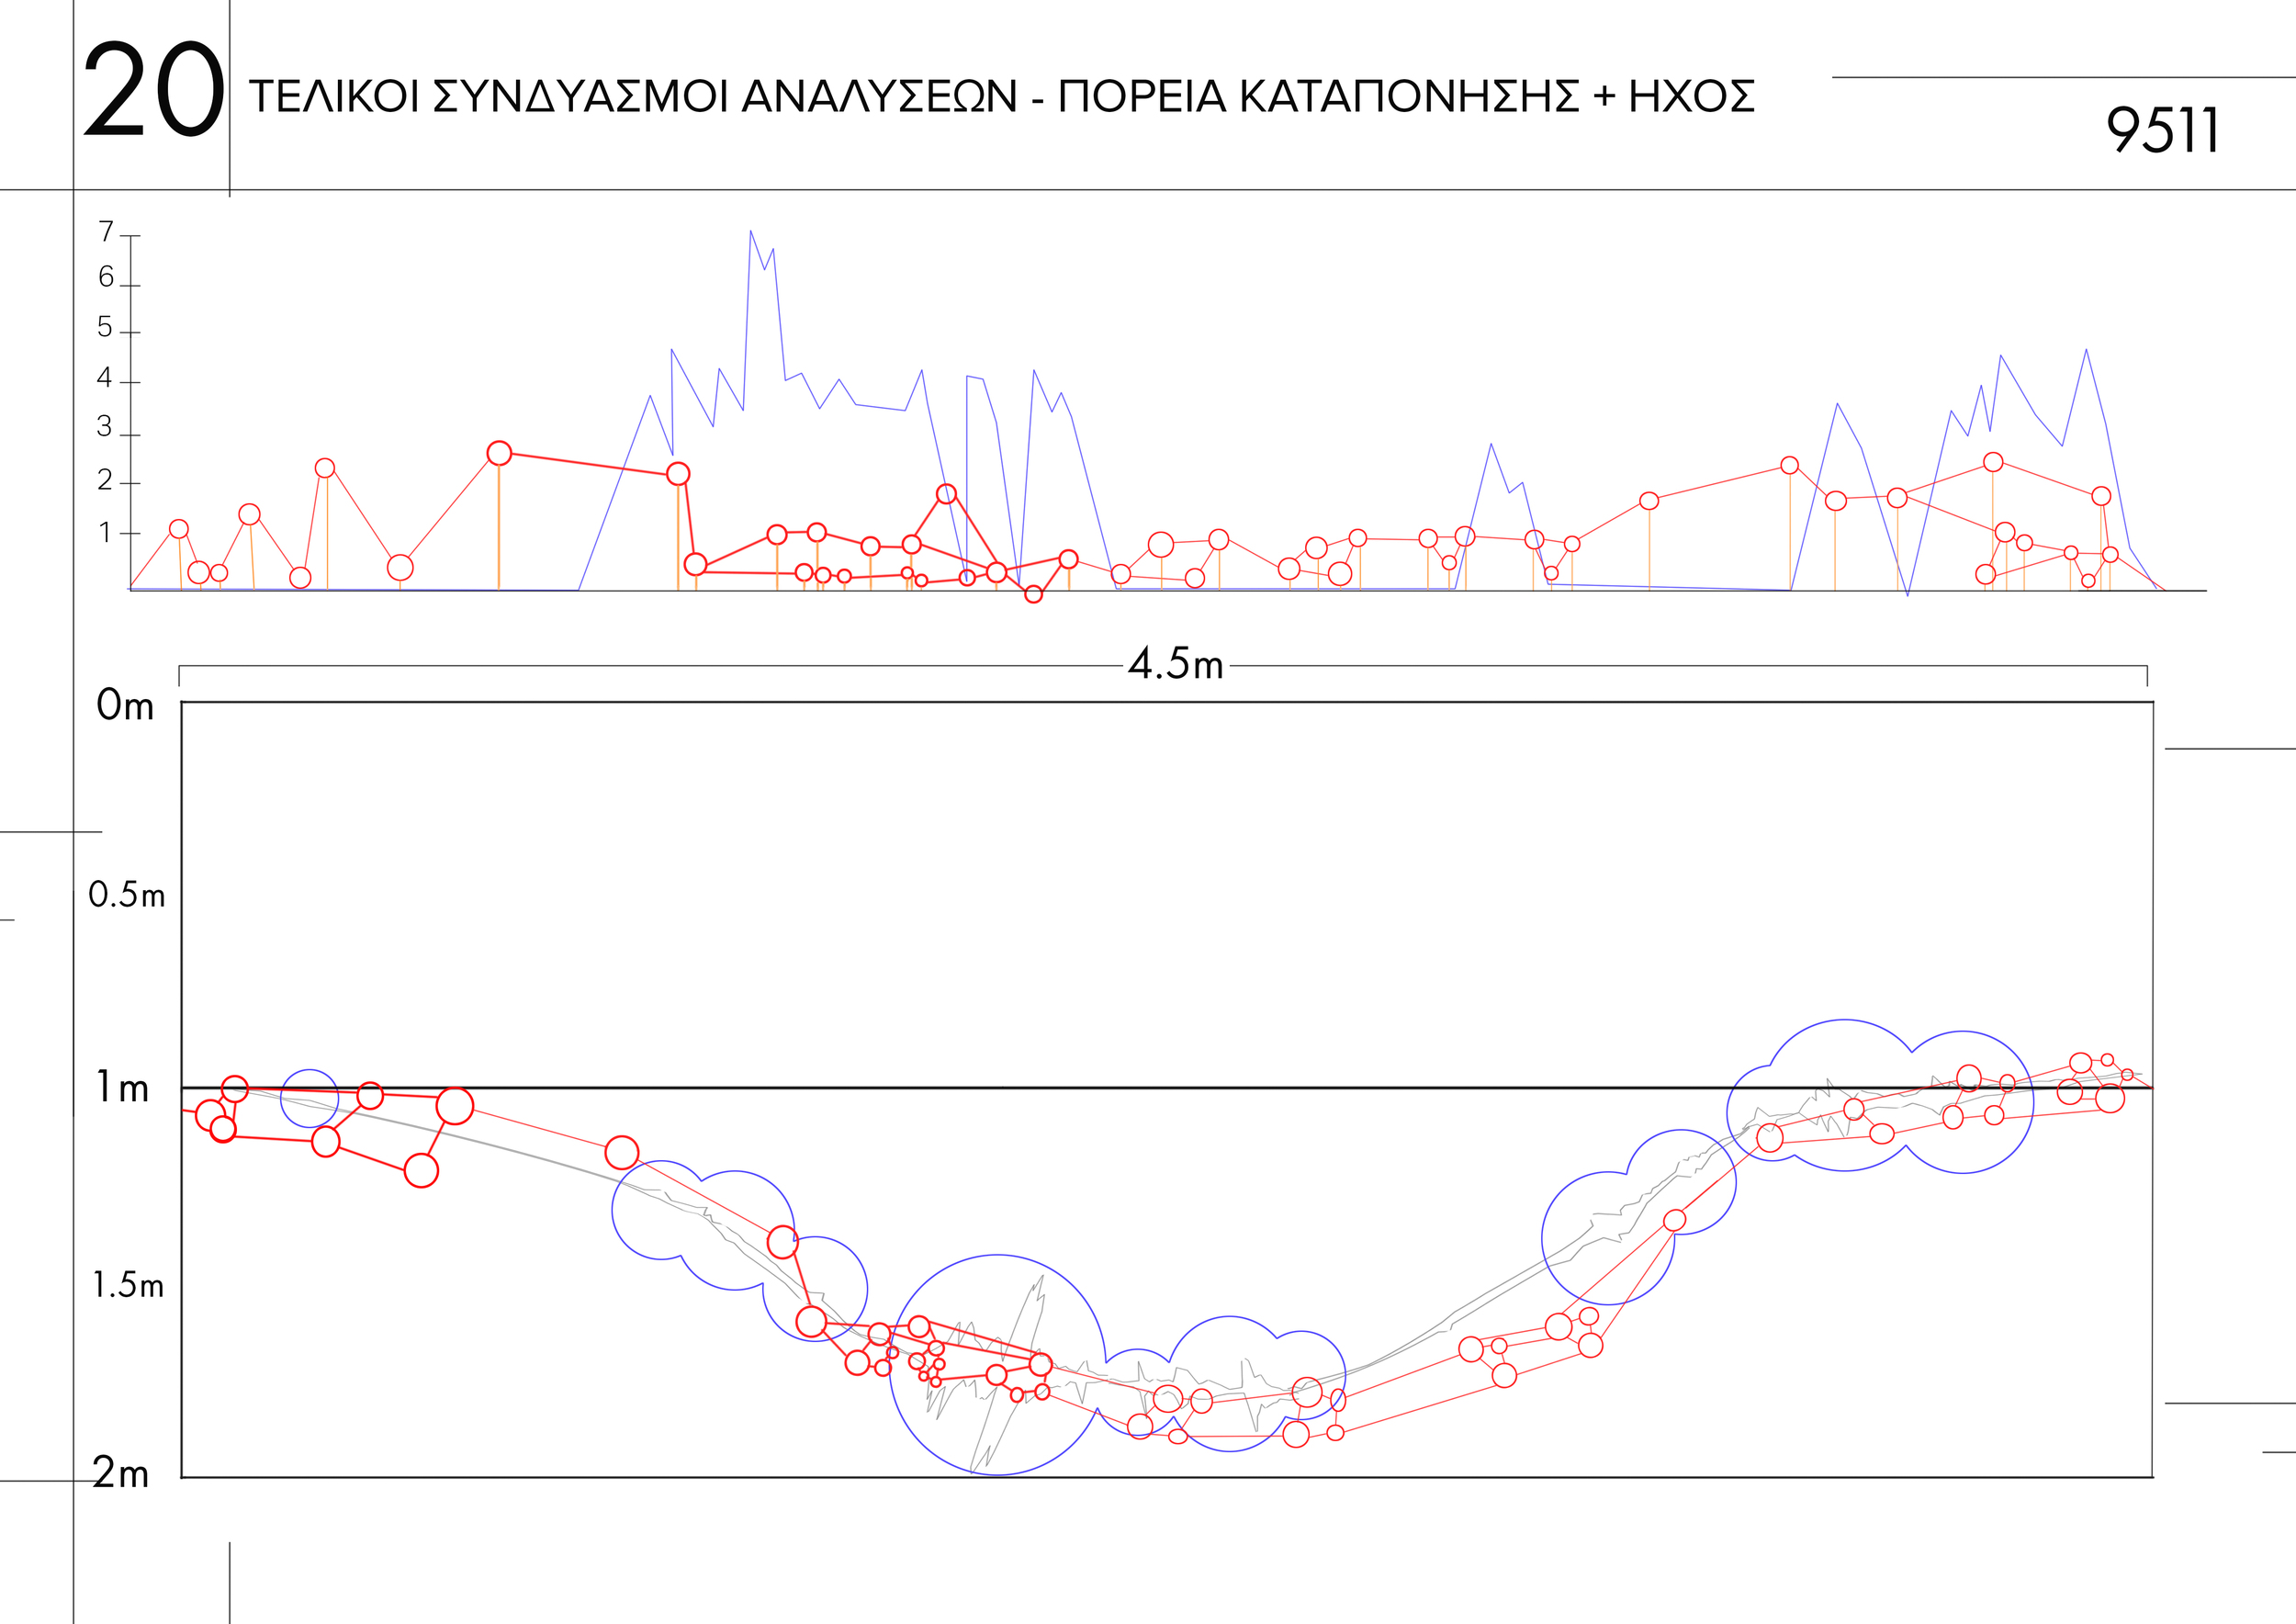
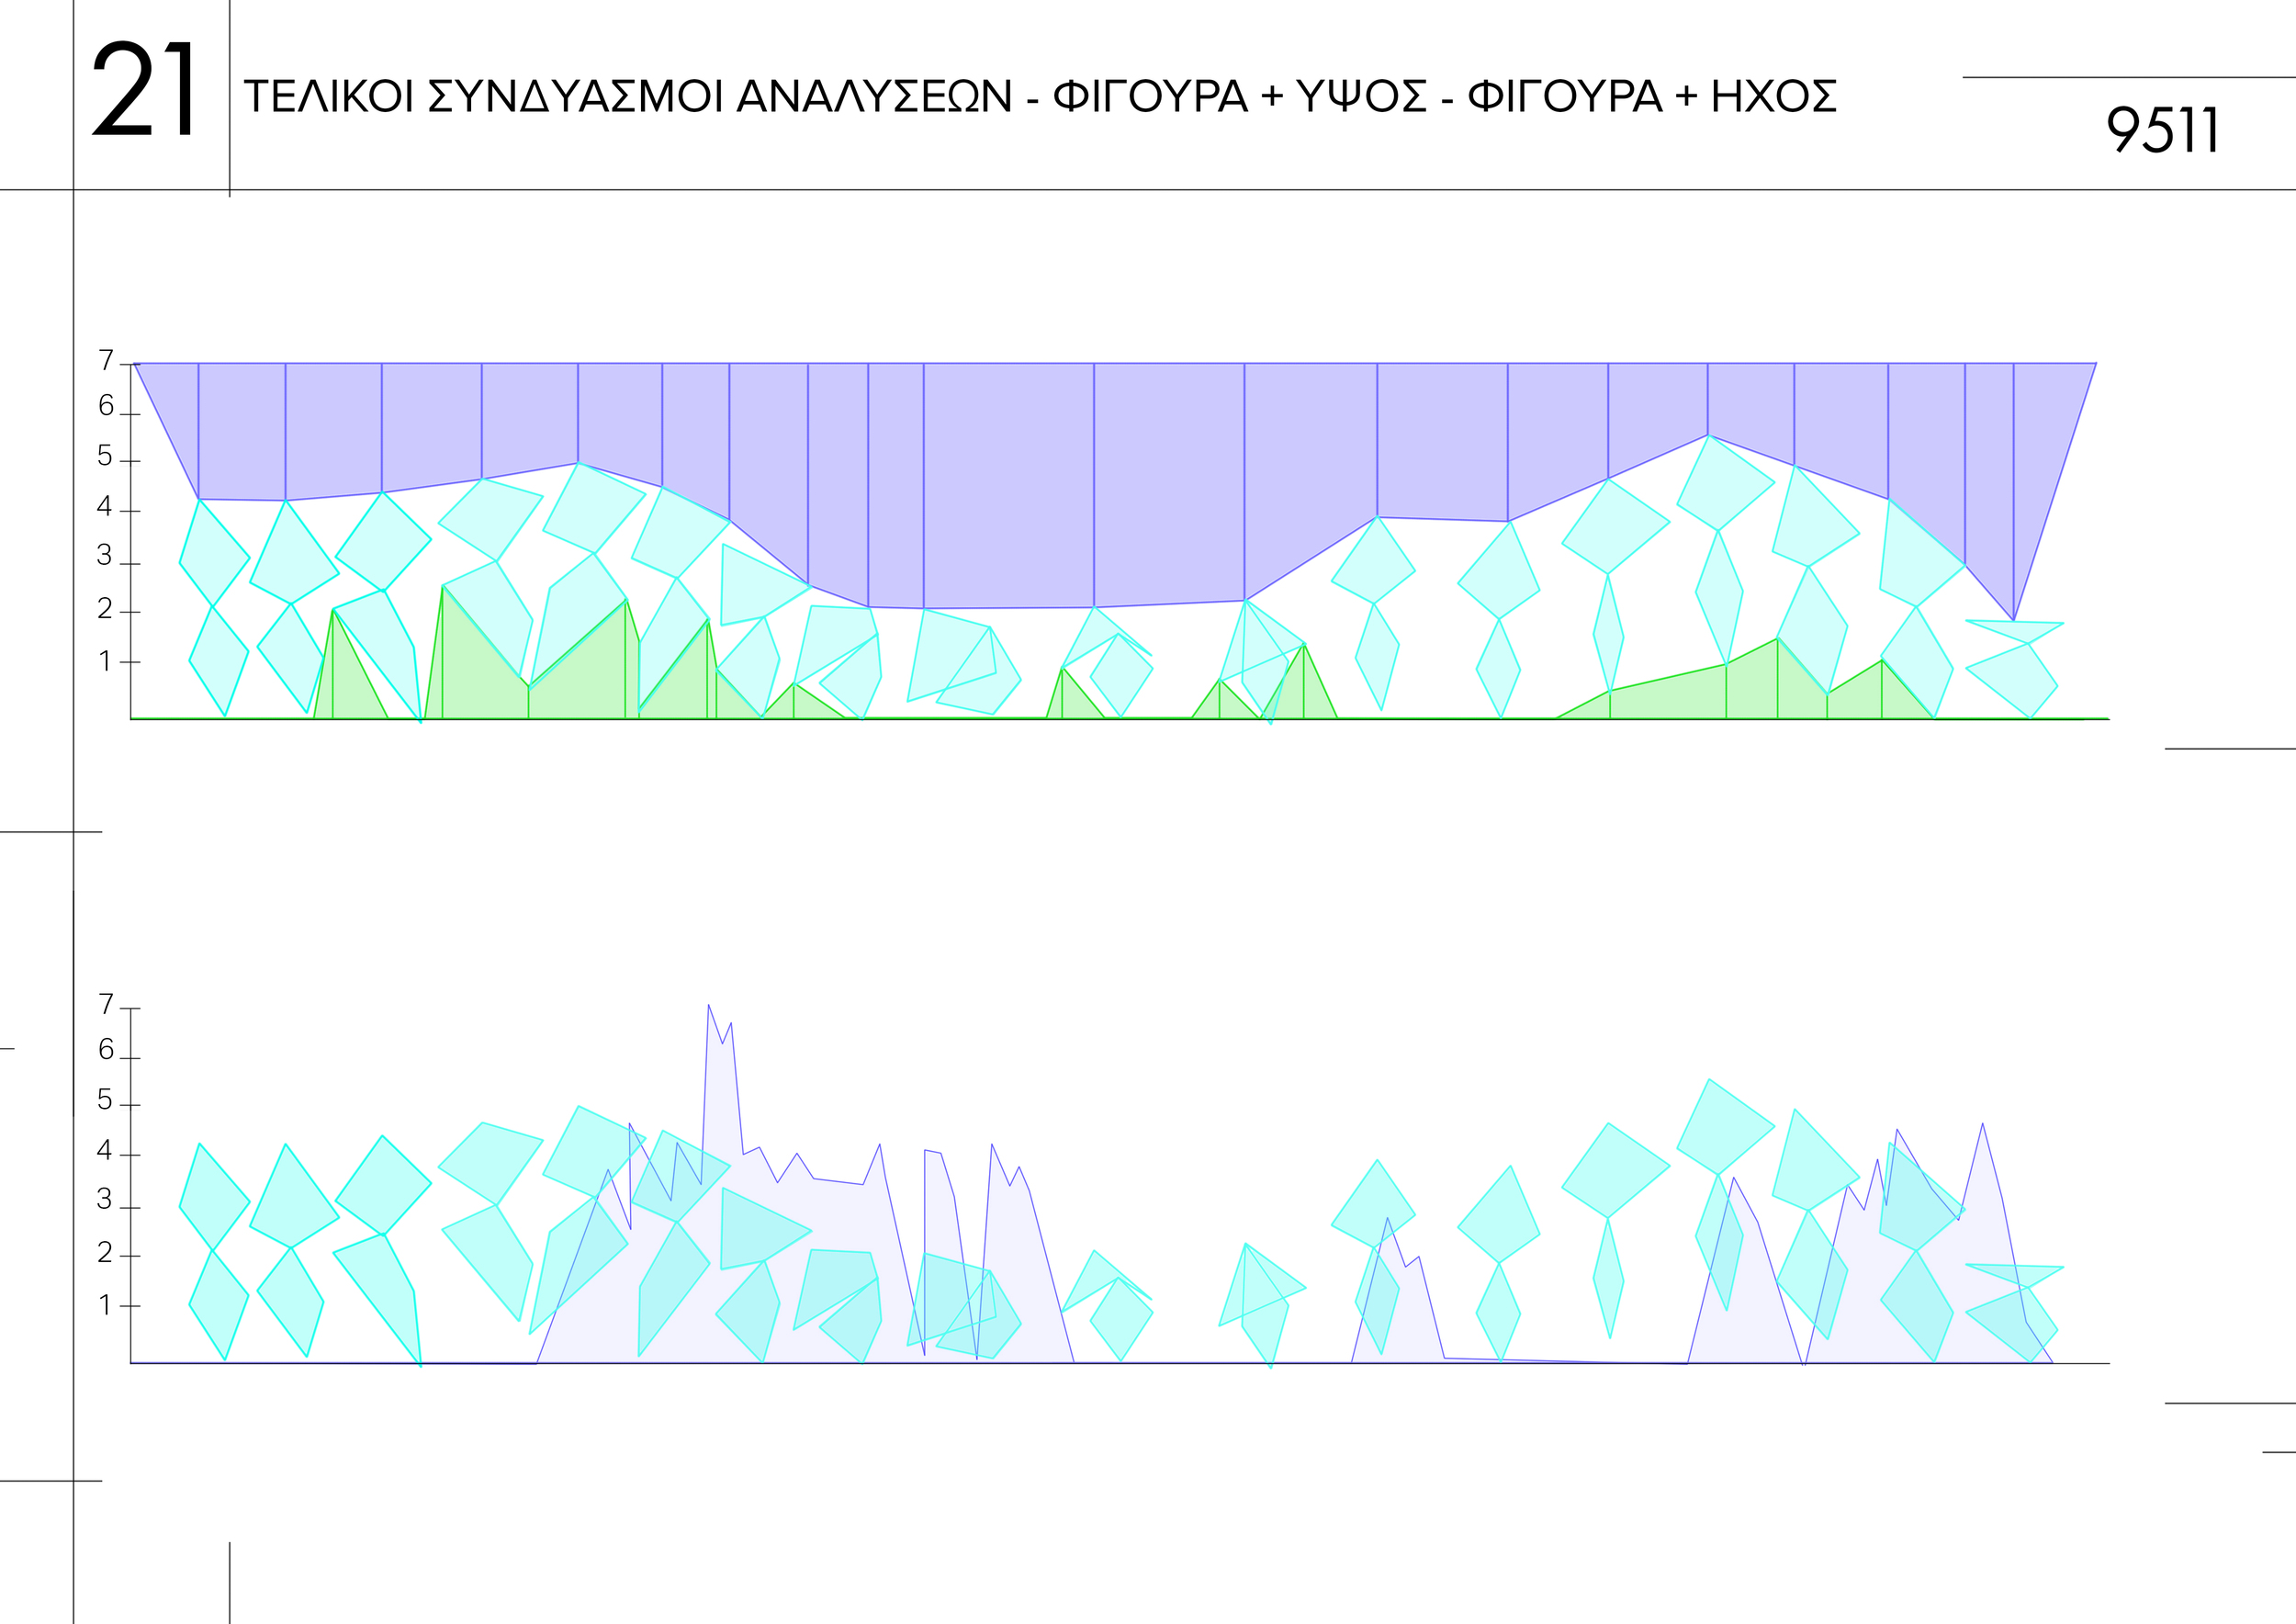
Further on in this process I started combining and breaking apart certain of the analyses generated in an effort to discover additional connections. For example, I decided to break down the overall movement into four phases - each of which consisted of a series of analyses which at the time were considered relevant :


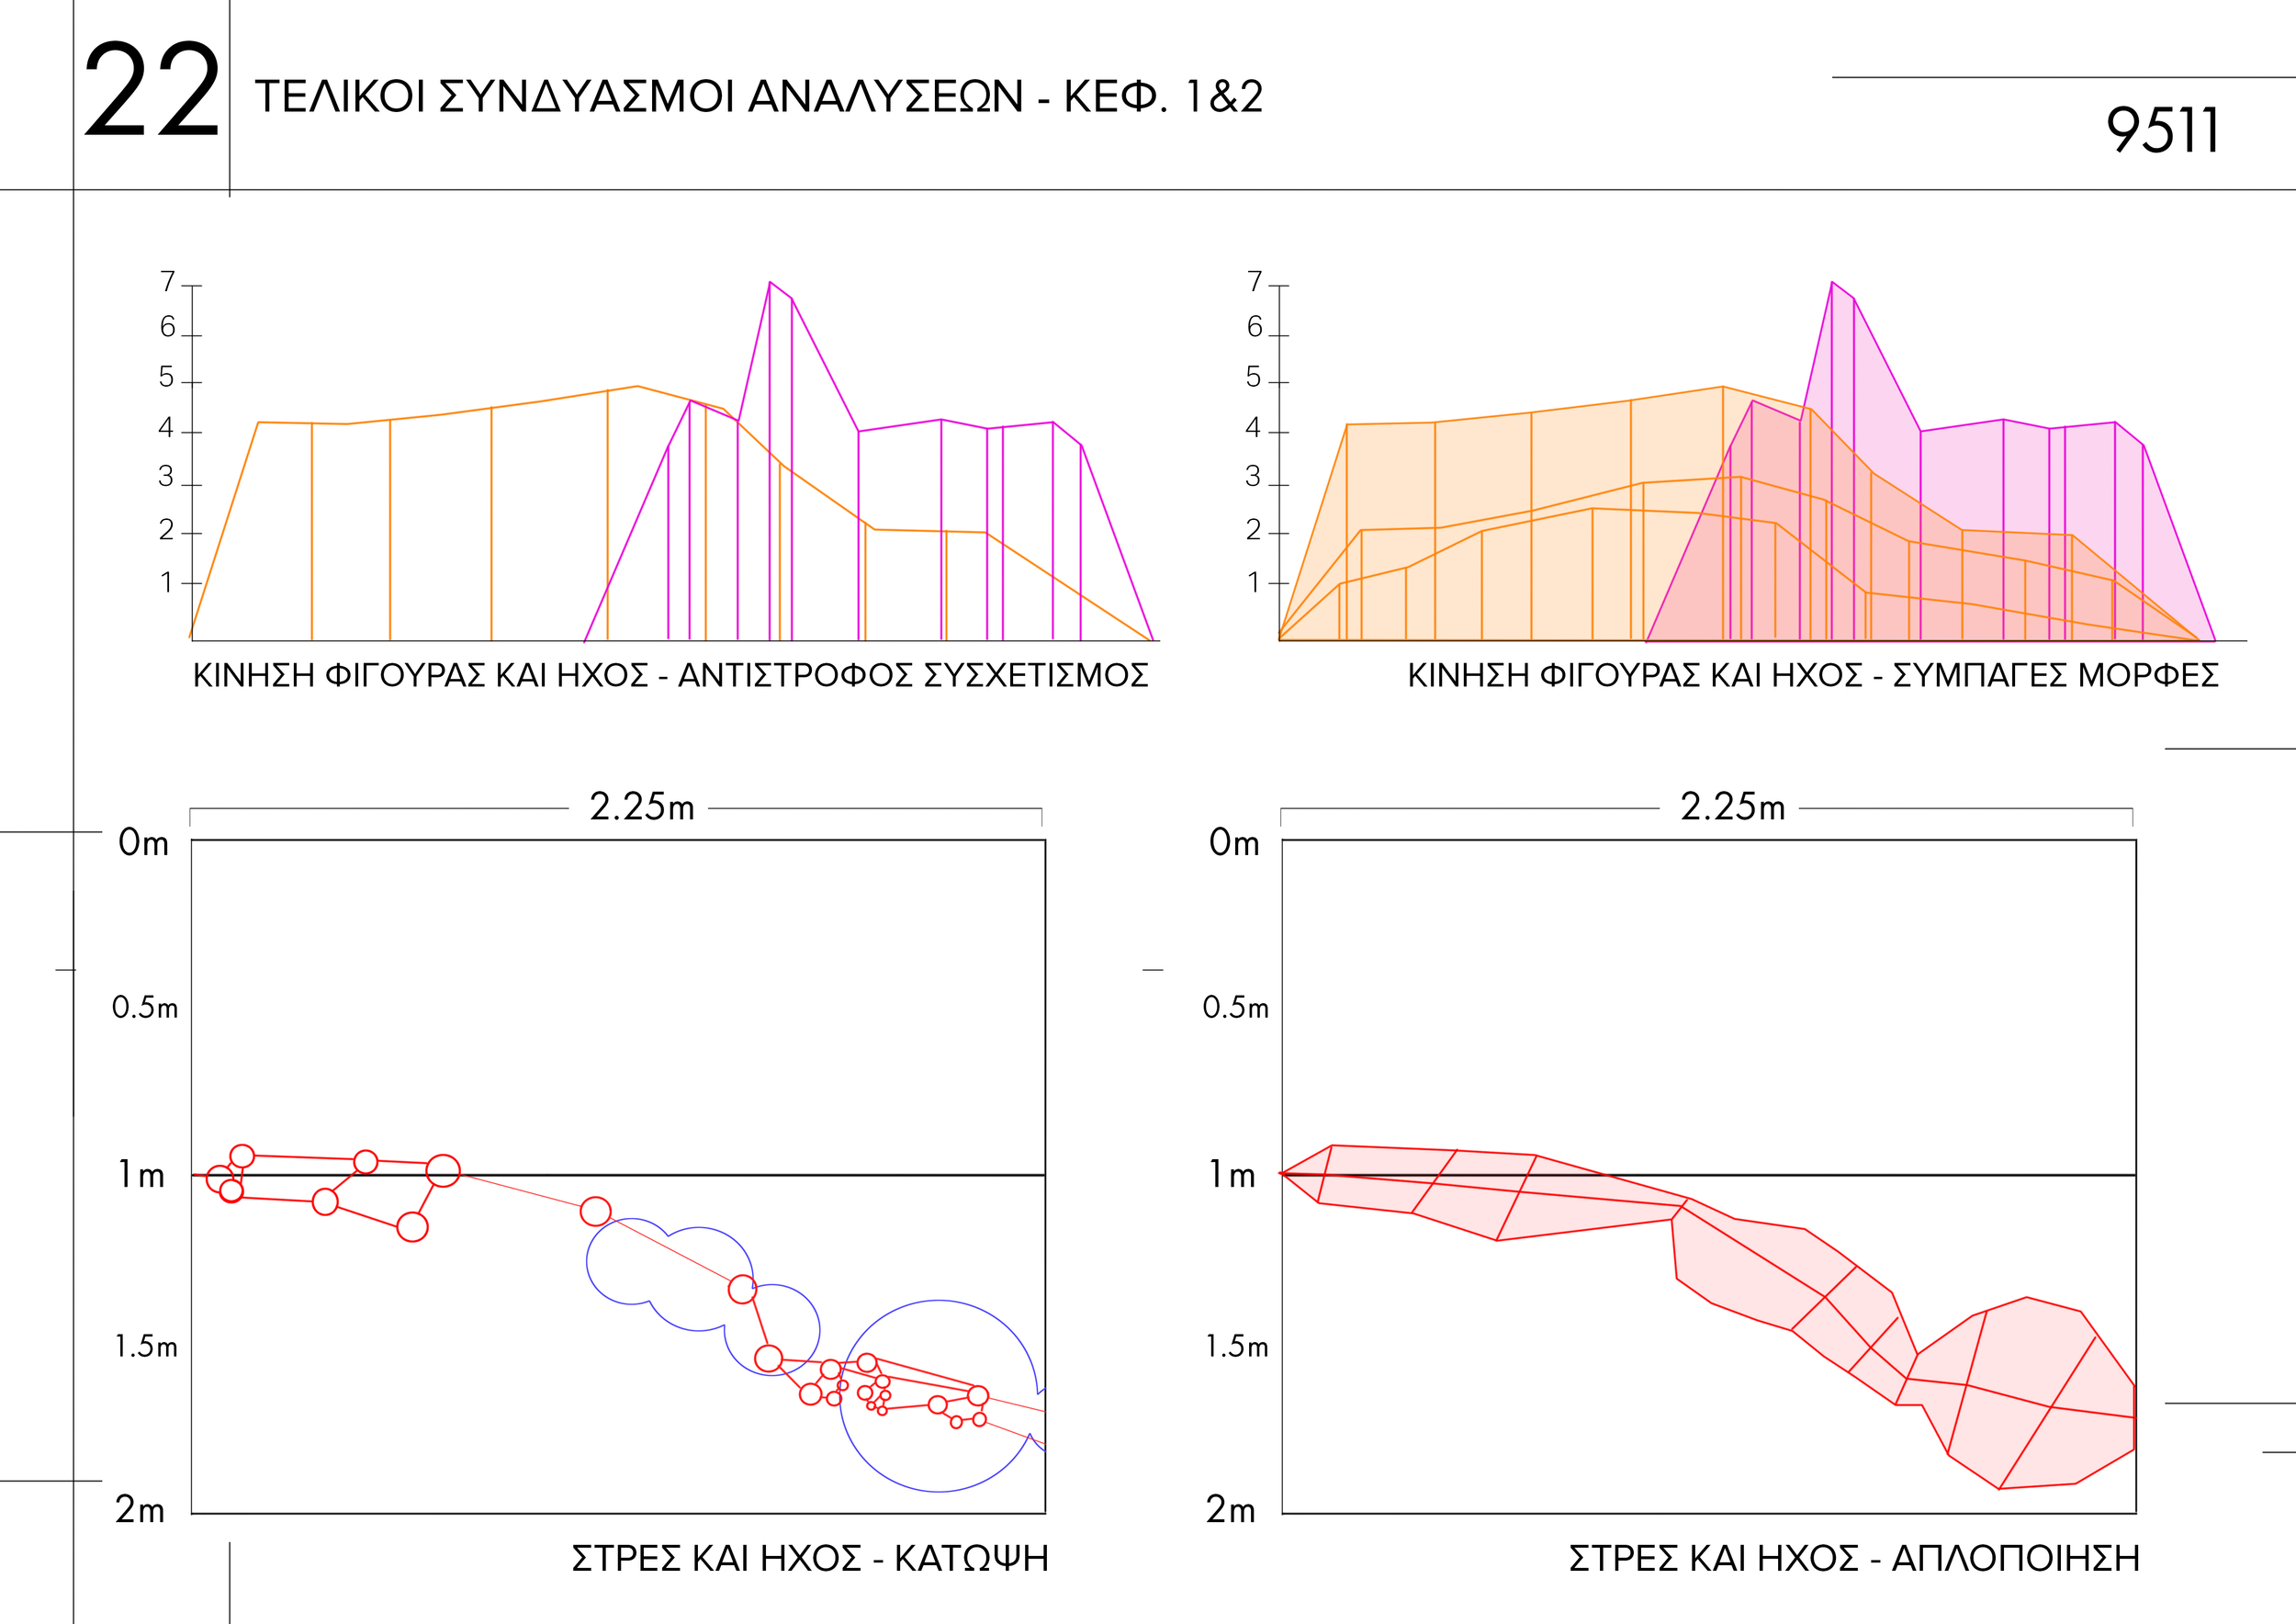
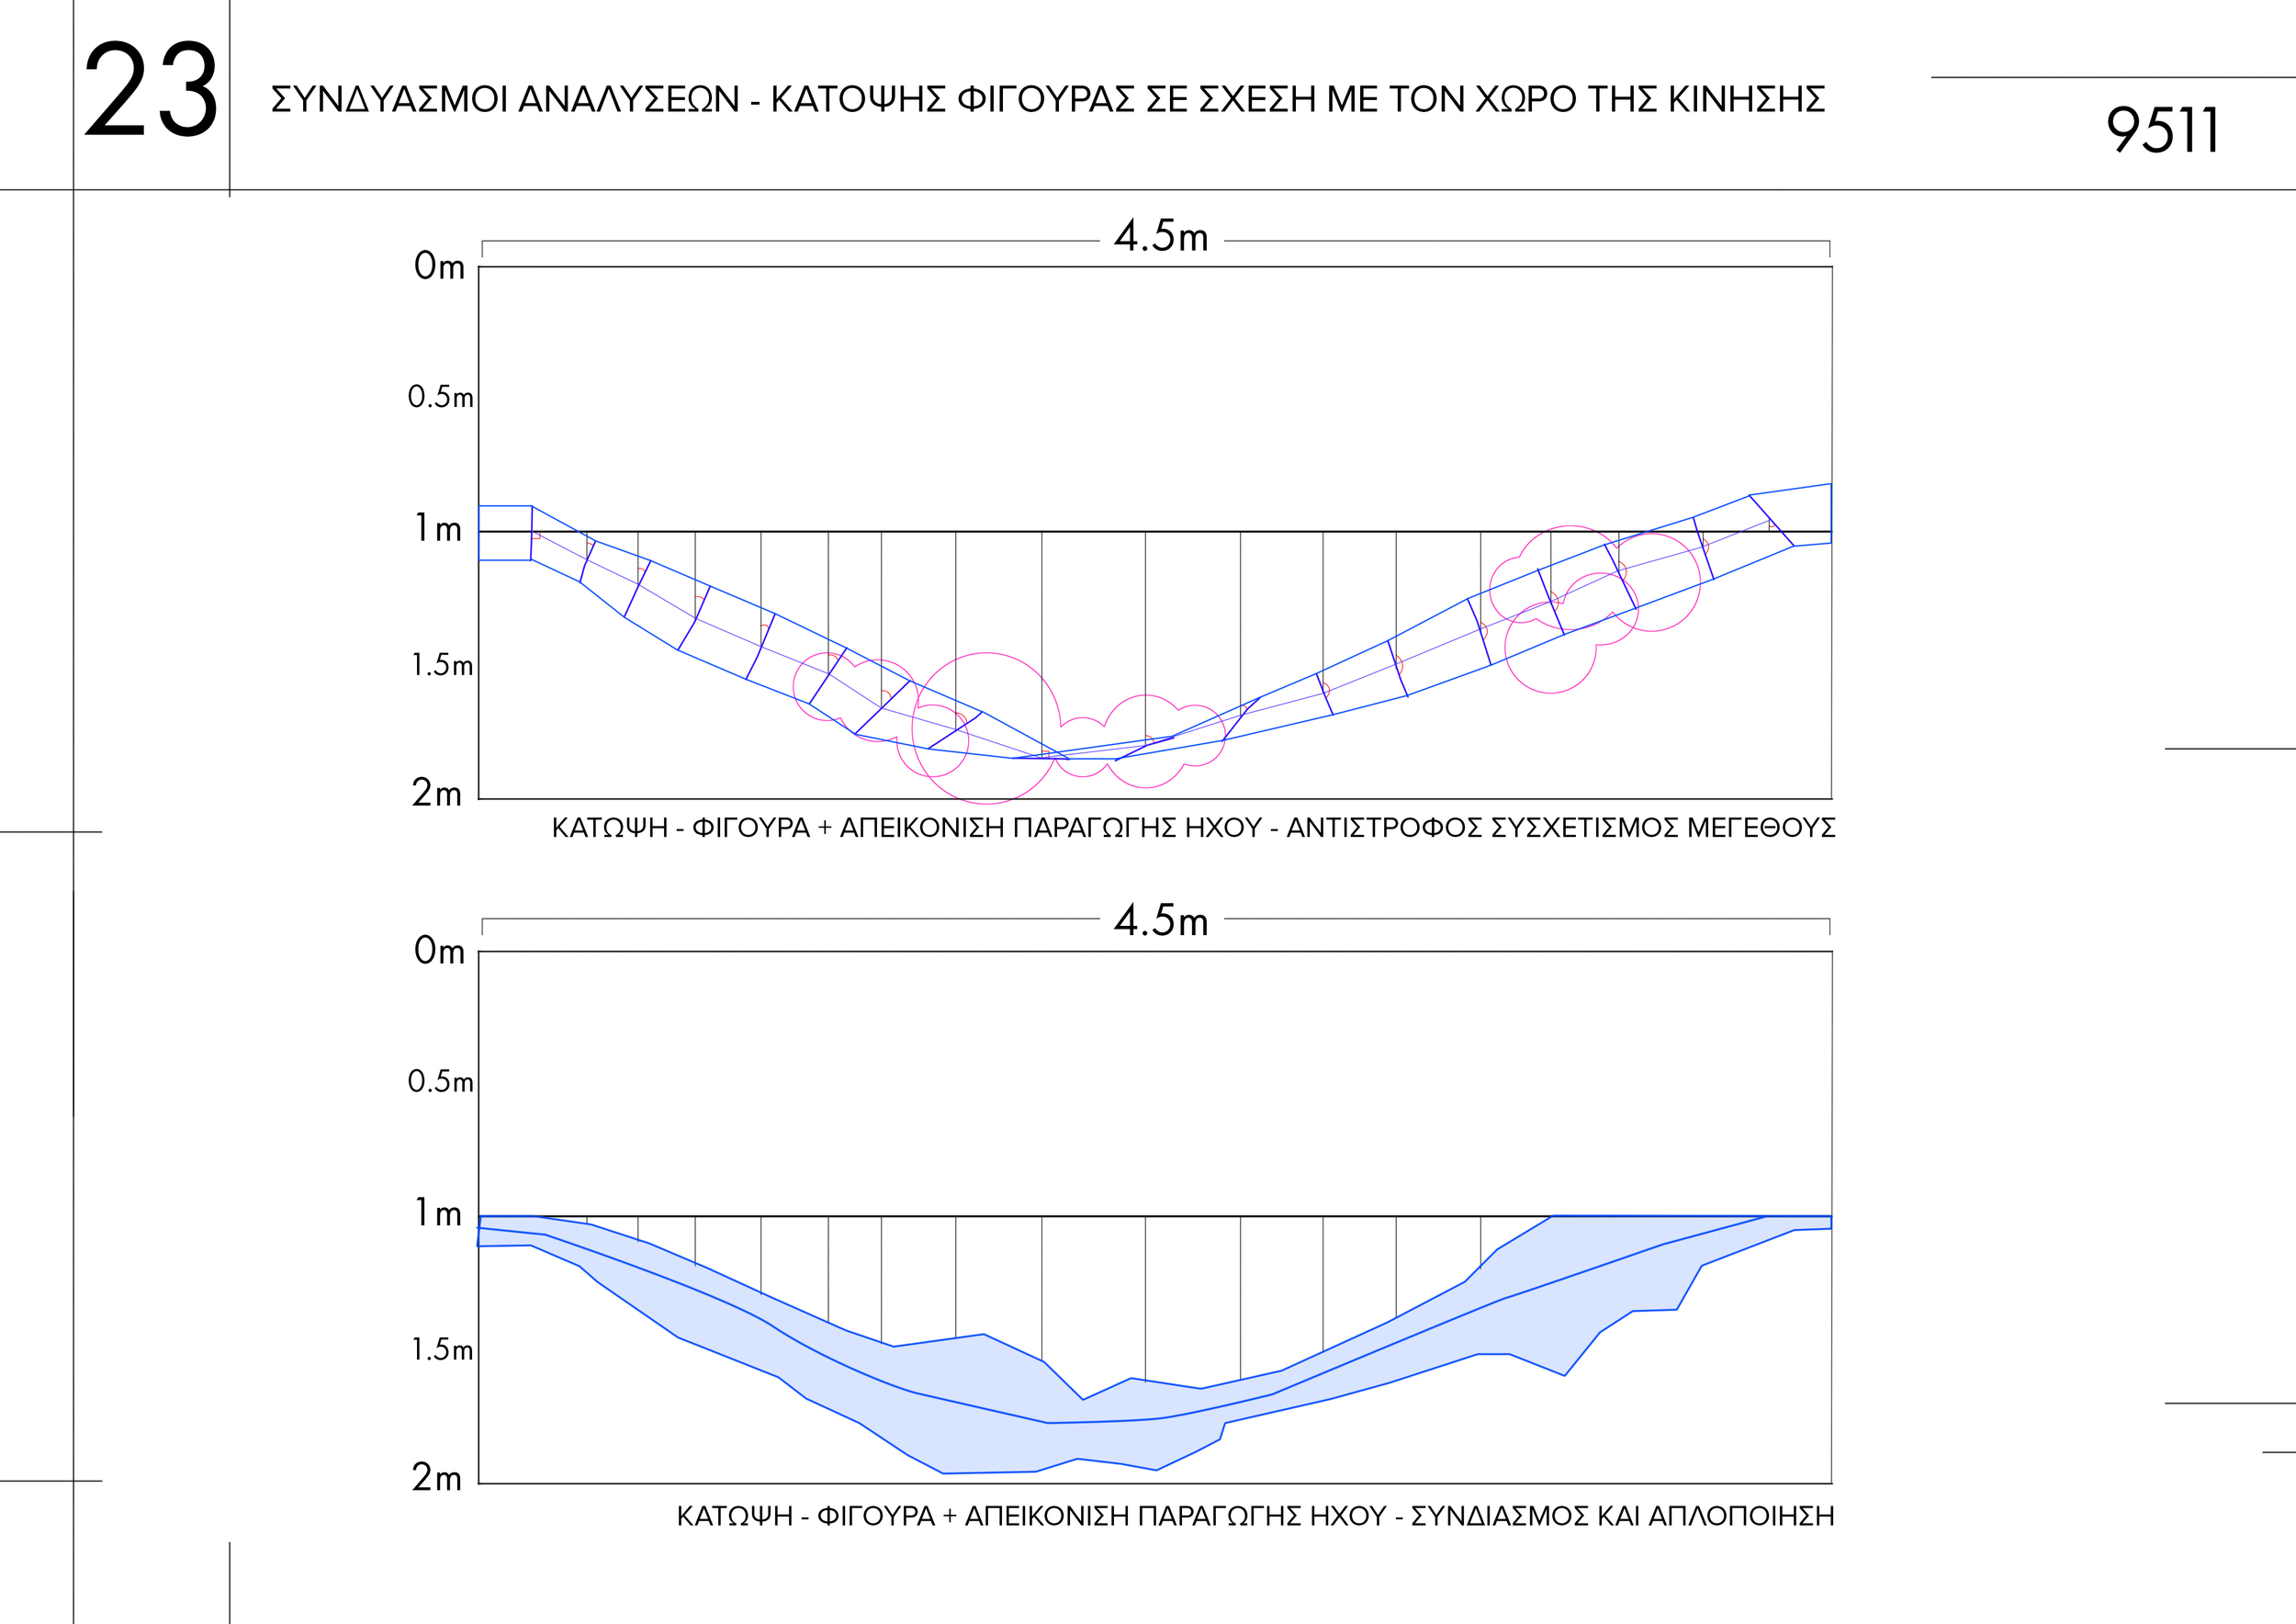
This is illustrated in the first four slides above, while slides 5-8 show different combinations of analyses such as negative space and sound generation (5) or the degree of deviation from the central line of the space by the figure (8).
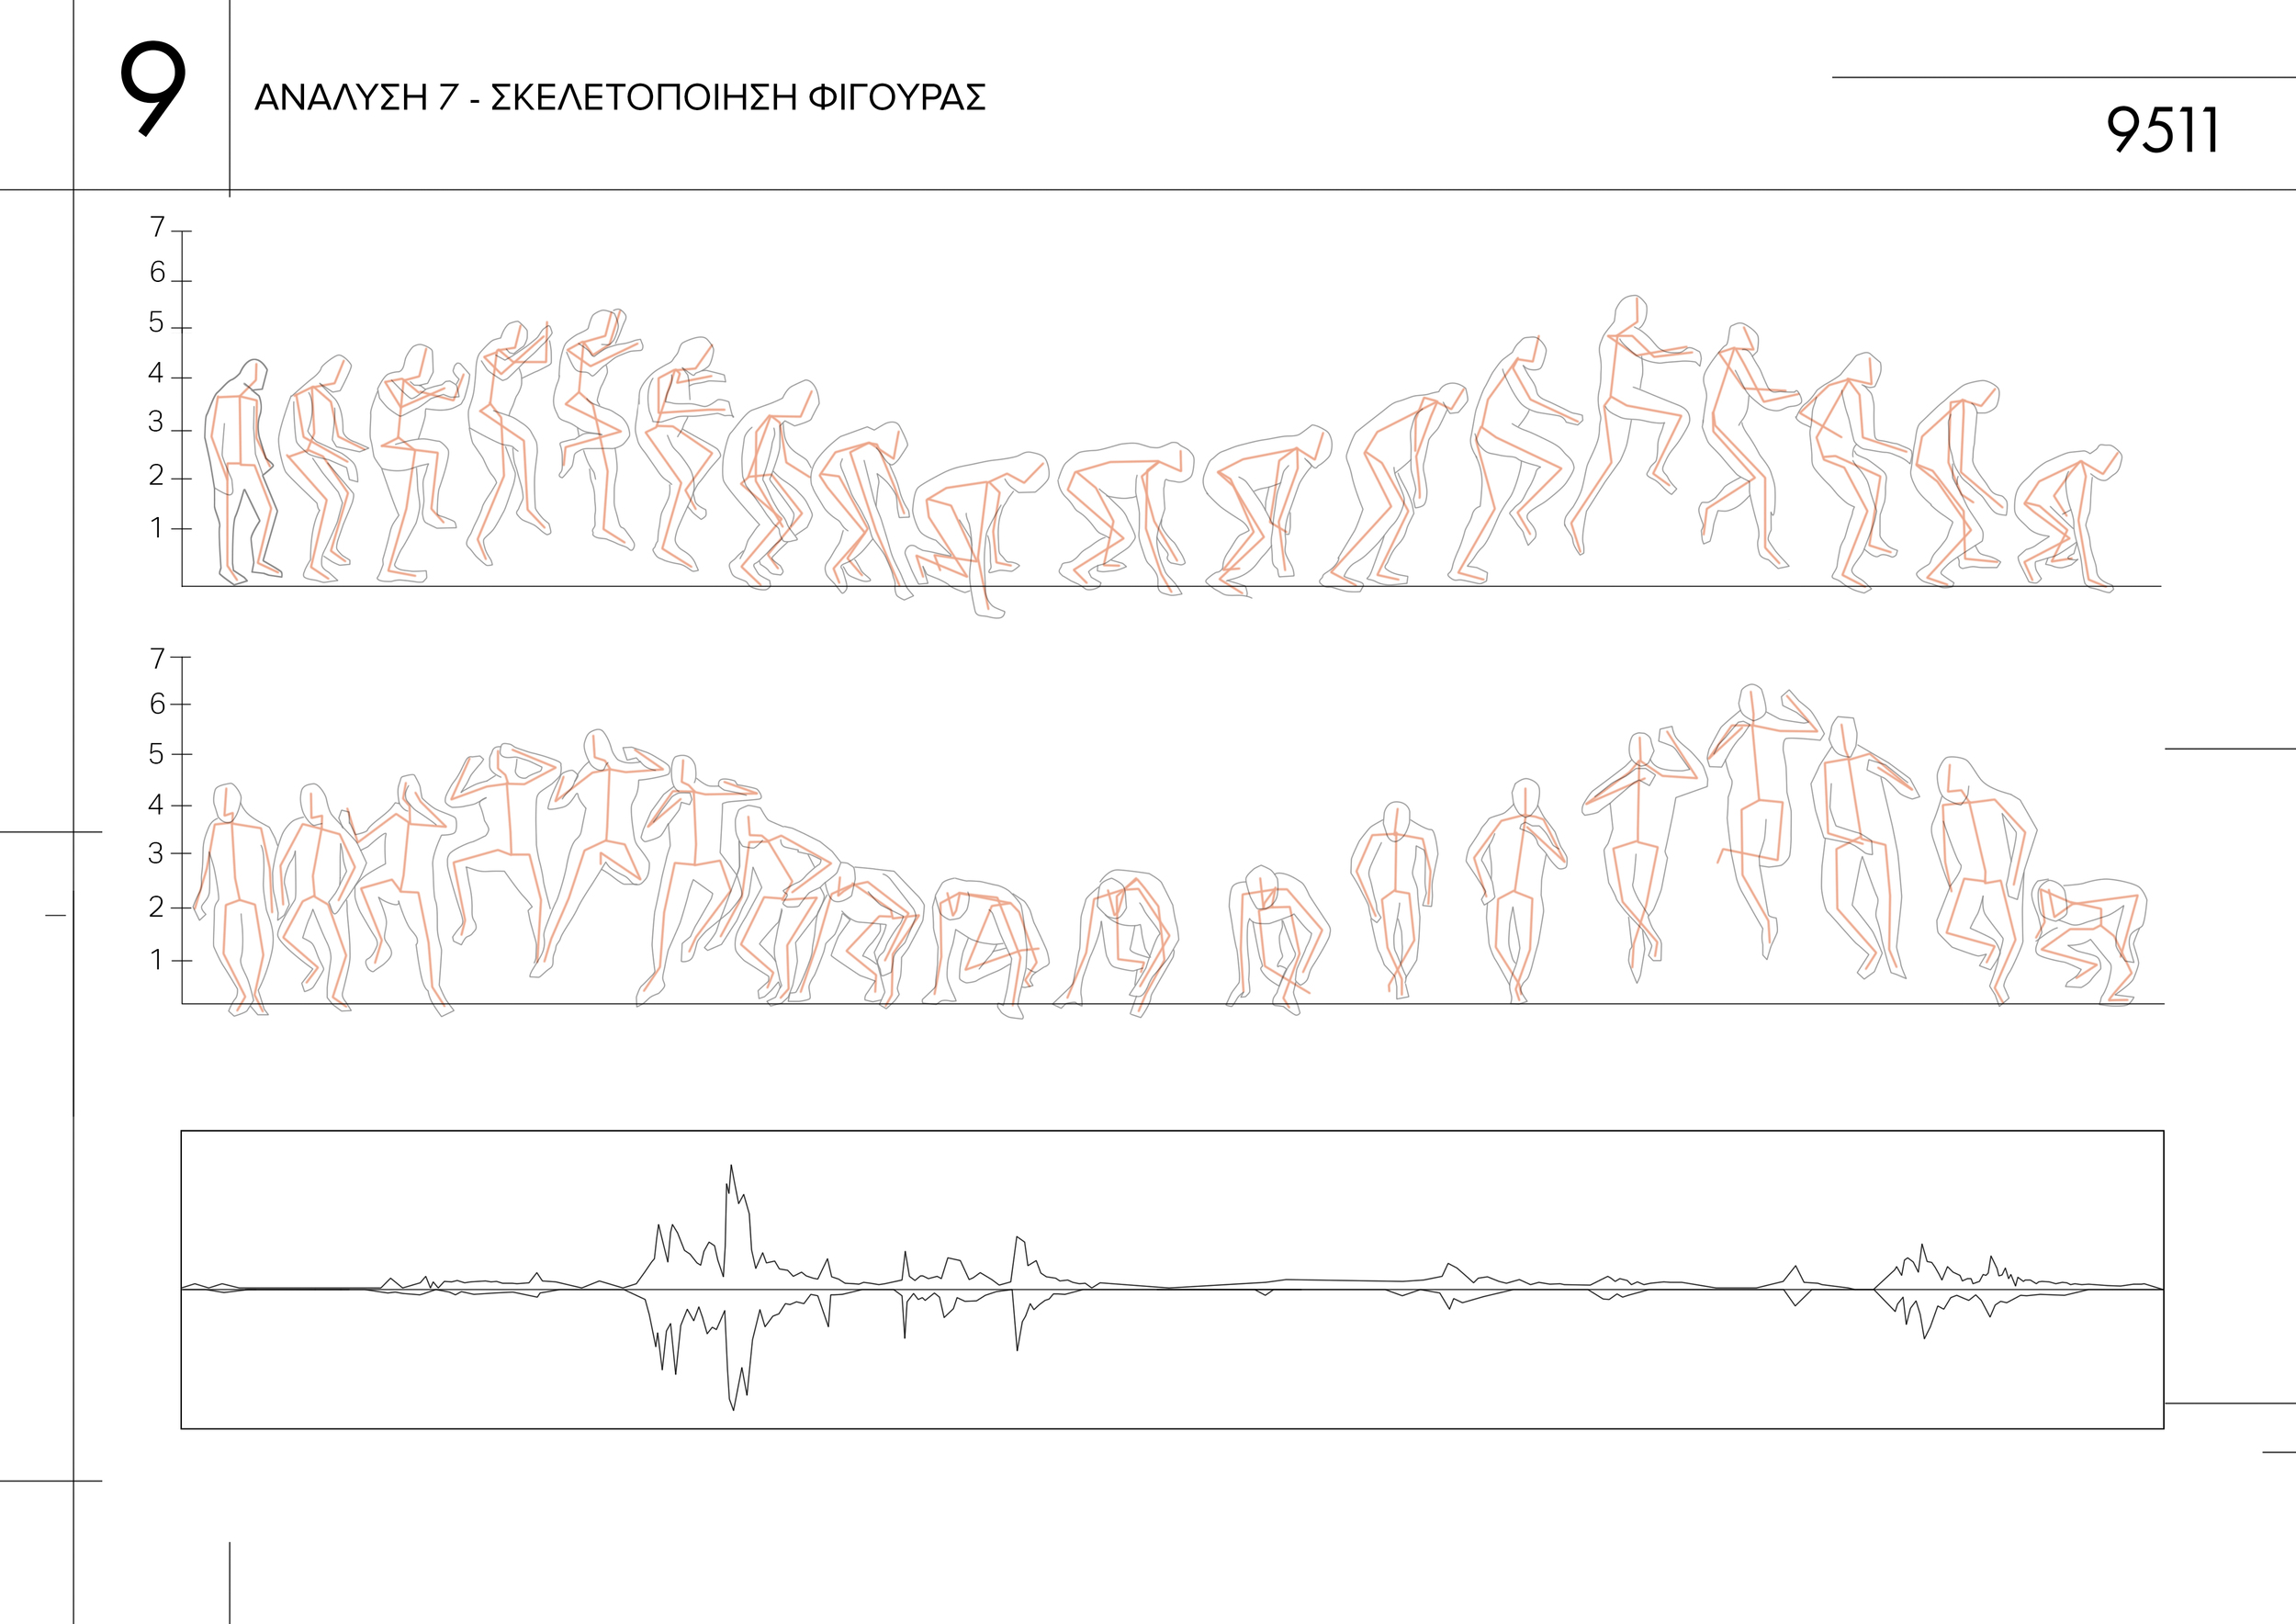
However, what I ended up using for the final project (the details of which will be covered in the next post) was the skeletization of the figure :
It's probably the simplest of the analyses that I went through, but by reducing the volume of the figure to a simple stick figure, was able to be more selective with the data provided. This reduction allowed me to see the figure, not as a humanoid moving through space, but as a selection of connected lines contracting and deforming over a particular area.
This enabled me to make further reductions and settle on a building module which I would go on to use to form the basis of the final idea for the site.
I'll be covering all that in the next post along with providing you with the final presentation in slide show form. If you have any questions fire away in the comments below, I'd love to get your feedback.